Waypoints enable ArmA 2 soldiers and occupied vehicles to move independently on a predesignated course from point A to point B. Waypoints add more realism to your mission by making otherwise stationary units mobile.
This tutorial will step you through the process of setting up looping waypoints, which will allow your units to return to their starting point and then repeat their journey over and over.
01
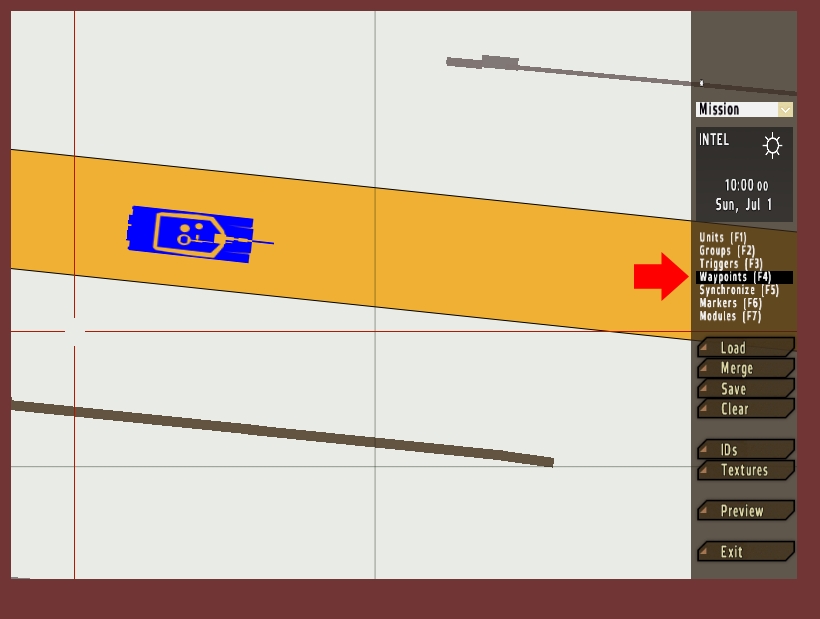
Click the 'Units' button on the right sidebar and create either a soldier or vehicle. Then click 'Waypoints' on the right sidebar and double click on the ground in front of your unit.
02
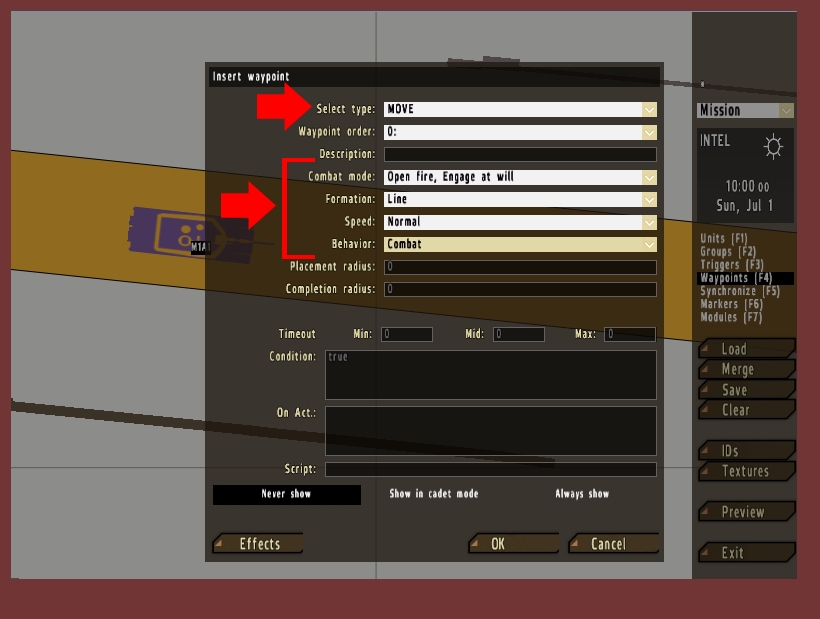
The 'Insert waypoint' window will open. The 'Select type' dropdown will default to 'MOVE' which is fine. The four dropdowns titled 'Combat mode' 'Formation' 'Speed' and 'Behavior' can be adjusted to your liking. You may need to experiment a bit to get the right effect. When finished, click 'OK'.
03
With 'Waypoints' still selected, double click on the map where you would like the unit to travel. You have the option of modifying its variables if you wish for this leg of the journey. If there are no changes then click 'OK'. You will now see a thin black line stretching between your unit and the second waypoint.
Double-click the ground again a short distance from the waypoint we just created, either above or below it. This third waypoint should be parallel to the second waypoint, as we are now beginning our return path.
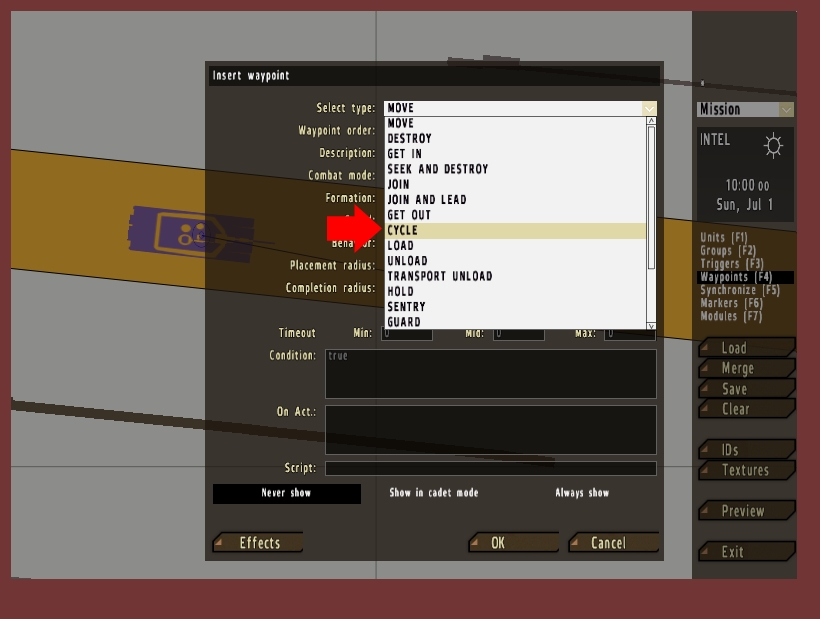
Create the fourth and final waypoint near the unit and change the 'Select type' of the waypoint to 'Cycle'. This will immediately create a connecting black line between your unit and the final waypoint.
04
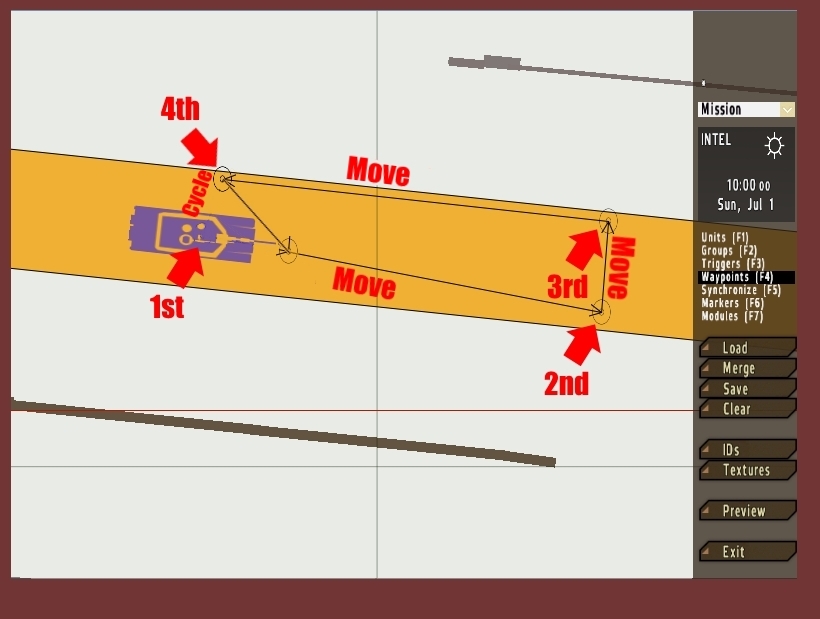
The end result should look something like the image layout below.
The 1st waypoint is located directly in front of the unit.
The 2nd waypoint is a short distance East.
The 3rd waypoint is just North of that
The 4th waypoint had its 'Select type' changed to 'Cycle'.
The waypoints can now be dragged and positioned the way you would like them. There is no limit to the number of waypoints you can create in a sequence. The key is to always change the 'Select type' of the final waypoint to 'Cycle'.
written by RJ Wattenhofer