UPDATE 09/07/14:This article is relevant to the Classic Steve Skin. The skin layout has
been modified for the new Alex Skin. For more information, please read the Mojang
support article.
Everyone needs their own individual look in Minecraft. One option is to download a pre-made
skin from one of the many sites offering extensive skin collections. A second option is to customize
your own skin. This article will teach you how to create your own custom Minecraft skin.
The first thing you need to do is download the reference skin. This will be the template you use to create
your custom skin. You can either download the reference skin from your Minecraft Profile Page or right click and save the
64px x 32px image below.
 ⇦ Reference skin
Now open the skin in your image editing software. If you do not have a program to edit images, you can
download the free digital photo editing software from getpaint.net. Once the skin is open, you will need to increase the size so that it is
large enough to see the individual pixels.
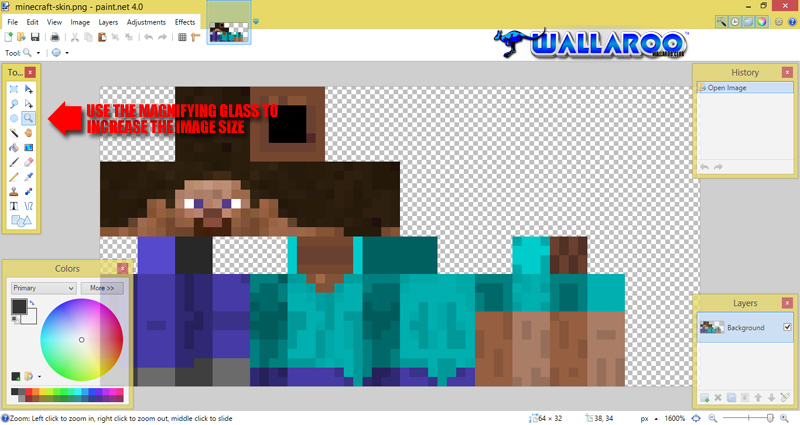
You are now ready to make your skin. Simply paint over the reference skin and save your changes.
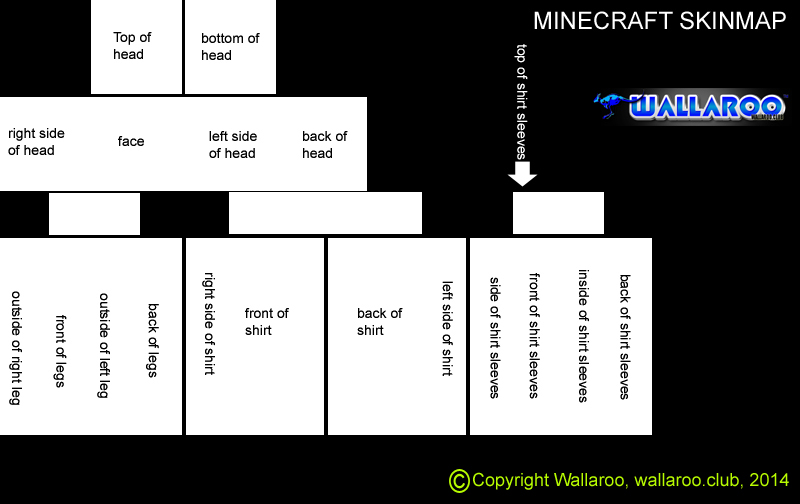
Deciphering the individual body parts can be tricky, so please feel free to use the handy skinmap provided
below to assist you in your creation. Each body part is clearly marked so that you can easily create your
Minecraft skin without any mistakes.
When your skin is finished upload it to your Minecraft account through your profile page. Click the
'Browse' button, open your skin and then click the 'Upload' button. Finally, log into Minecraft via
the launcher and view your new skin!