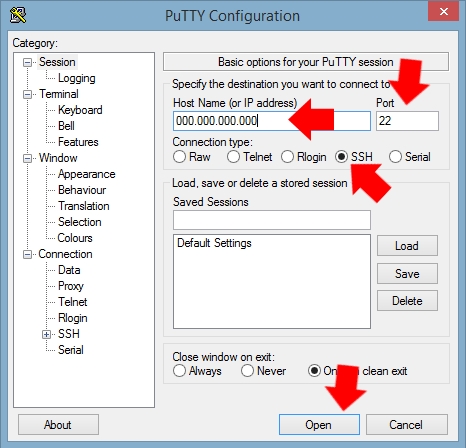
Begin by launching PuTTY. Enter the VPS ip address in the host name field. It will be in this format: 000.000.000.000.
Then enter port number in the port field - this will more than likely be the number twenty-two.
Make sure the SSH radio button is pressed and then click 'Open'. You will
now have a black screen that simply shows 'login as:'. We want to login to
your VPS root folder, so type in 'root' (case sensitive) and hit 'enter.'
Now you will be asked for your server password. Please enter that now.
The few lines of code that follow are taken directly from the Linux section
of the
Garry's Mod Wiki dedicated server page. Enter each of the five lines in separately,
hitting 'enter' after each entry. This will upload and install both the
SteamCMD and the Garry's Mod server.
mkdir ~/Steam
cd ~/Steam
wget http://media.steampowered.com/client/steamcmd_linux.tar.gz
tar -xvzf steamcmd_linux.tar.gz
./steamcmd.sh +login anonymous +force_install_dir ../gmodds +app_update 4020 validate +quit
QUICK TIP: Copy each of the lines
to your clipboard. To paste into PuTTY, simply right click with your mouse!
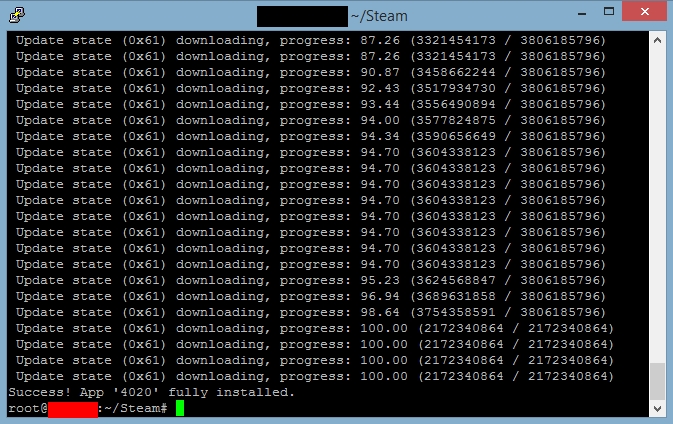
If the server has been successfully installed,
you will see the words 'Success! App '4020' fully installed.'
MOVING THE SERVER
Your Garry's Mod server is now functional and ready for players; however, if you are like most people you
more than likely do not want your server sitting in the root folder of your VPS. We will now create a
new directory that will be the permanent home of your server.
Launch putty once again and navigate to the directory where you would like to create the new directory. You
can do this by entering the following command:
cd /home
This will take you to your home directory, presuming that you have a home directory. If you are a new owner of
a VPS, I would suggest browsing through the server's file structure via Filezilla to familiarize yourself
with the layout.
Now enter this command to create your server directory in the home directory:
mkdir gmodds
Let's move the GMOD server files into our new directory:
mv -v ~/gmodds/* /home/gmodds/
The server is now in the correct location and we are ready to customize it.
CUSTOMIZING THE SERVER
Garry's Mod has no built-in administrative rights, so we are going to take care of that right now
(you'd like to be an admin, correct?). Click the following link to vist the
ULX and ULib downloads page. Scroll down to the section titled 'The latest stable release version of ULX and ULib'
and download 'ULX 3.62 Installer w/ ULib 2.52 (.exe)' (note: version numbers may be different). Drop
the file into a new folder on your desktop and run it.
After it runs, you will see that it has unpacked a folder called 'addons'. Open this folder, go into the ulx
folder and then double-click to open the text file titled 'ulx_motd'.
To view code you will need to expand your screen...
  <html>

<body bgcolor=#dbdbdb>

<div style="text-align: center;">

<div style="width: 80%; margin: 0px auto; border: 10px solid #c9d6e4; background-color: #ededed; padding: 10px; font-size: 12px; font-family: Tahoma; margin-top: 30px; color: #818181; text-align: left;">

<div style="font-size: 30px; font-family: impact; width: 100%; margin-bottom: 5px;">My Server Name</div>

<br>

This Server uses the following mods:<br>

ULX, PropDefender, and VMFLoader.<br>

<br>

<h2>Rules</h2>

1. DON'T MESS WITH OTHER PLAYERS STUFF. If they want help, they'll ask!<br>

2. Don't spam.<br>

3. Have fun.<br>

<div style="width: 100%; text-align: center; margin: 10px; font-weight: bold;">- The Admins</div>

</div>

</div>

</body>

</html>
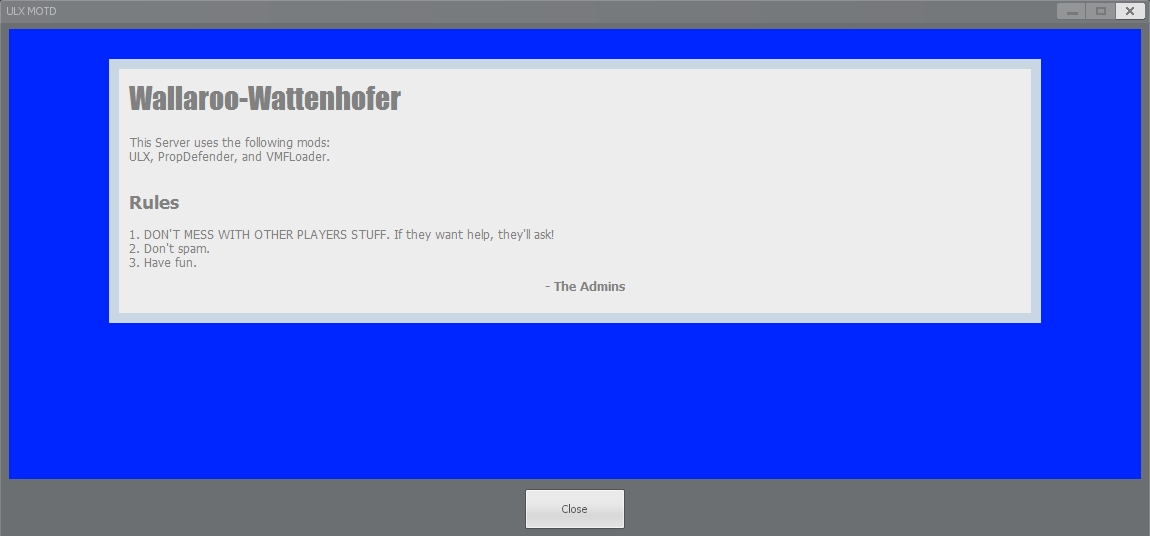
This is a basic HTML coded page that displays when players first enter your server. The six digit
number and letter codes (#dbdbdb) are hexidecimal colors that can be customized. You can use my handy
Hexidecimal Color Code Chart to assist you in selecting your preferred color scheme.
This is what it looks like in-game with the background color changed to #0026FF (blue):
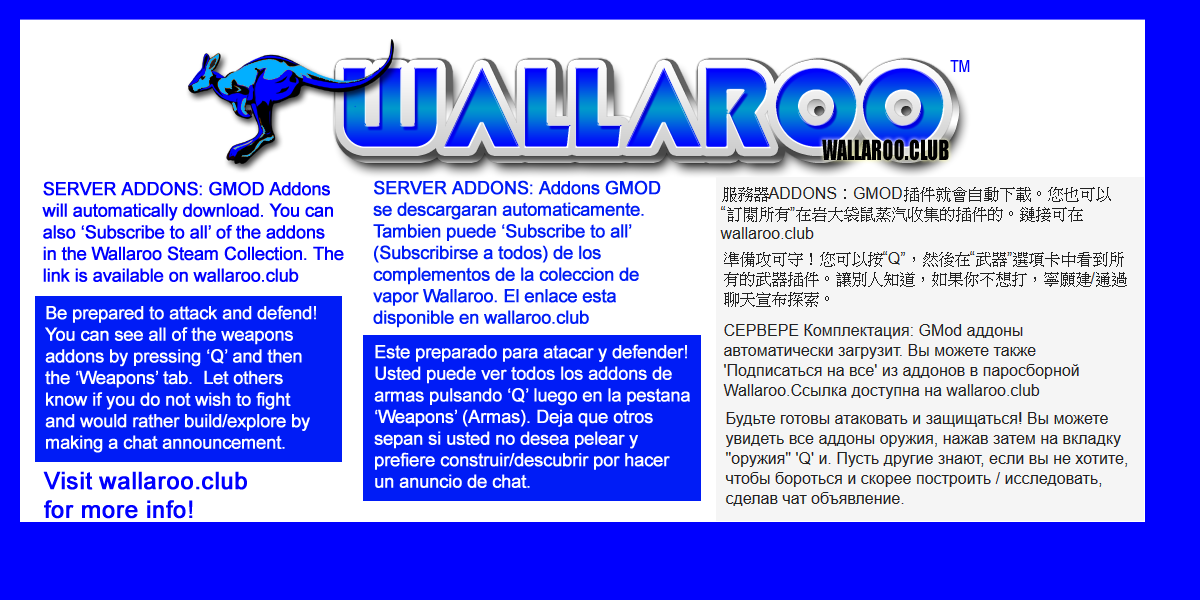
Okay, go ahead and close the file if you are finished. We will now create our loading screen. This
is the initial screen the pops up when players click to join your server and displays while addons and
such are loading. You will want to use a graphics program such as Paint.NET to construct your 1200x600px artwork. Below is our loading screen:
For sure, it's going to take awhile to design a decent loading screen. For now, why don't you create a quick
and simple image for testing purposes. You can always change it later. This image will need to be uploaded
to a paid or free website hosting service so that you can grab the image link for the necessary server file.
Where we are so far: We have the server operational and in the right location on the VPS. The ULX and ULib
files have been downloaded. The admin screen is complete, as is the loading screen. Time to go into the server.
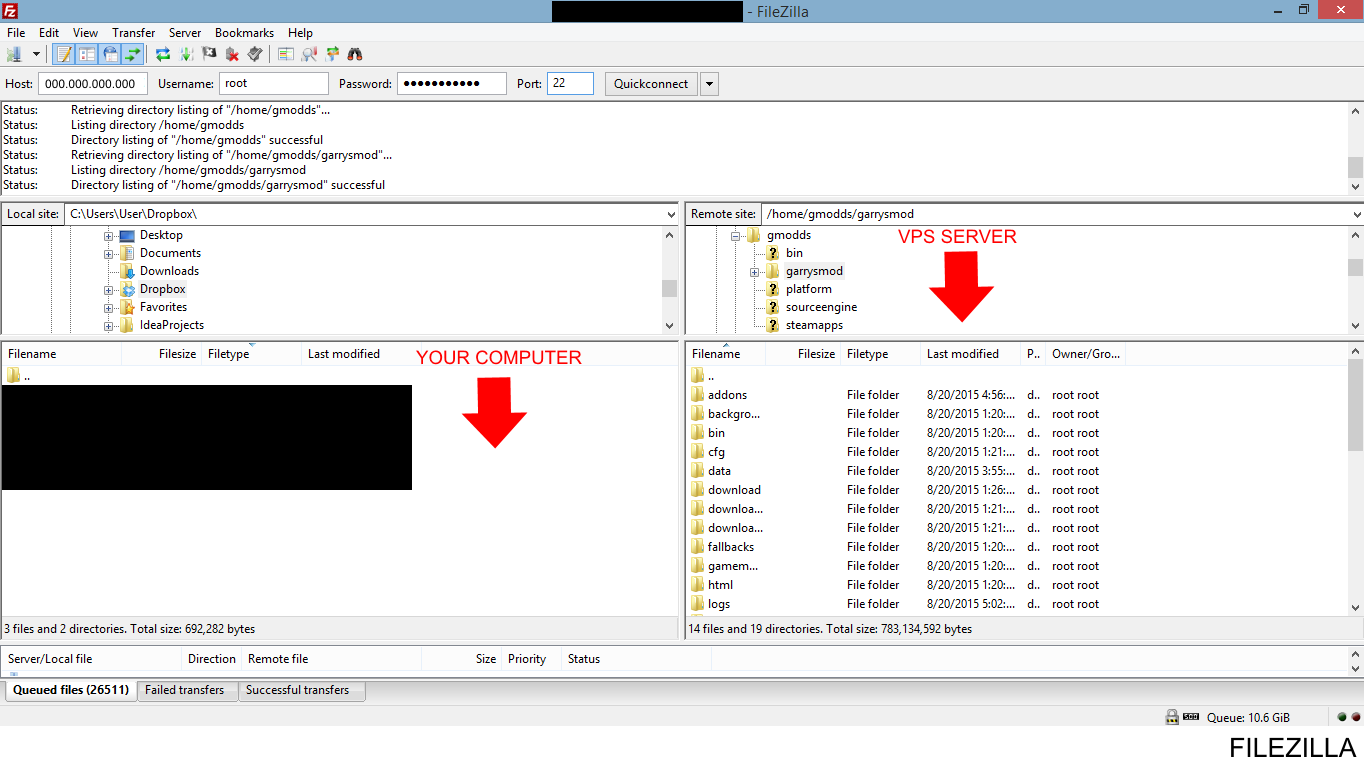
FTP
Launch your FTP software. I suggest using Filezilla or WinSCP , as both are reliable, regularly updated and user-friendly. Here is your interface:
Navigate to the 'addons' folder - here is the path on your VPS: gmodds > garrysmod > addons
Open the folder on your desktop via Filezilla to which you installed the ULX/ULib software. Drag the folders
titled 'ulx' and 'ulib' to your server 'addons' folder. Your admin software will now be installed when we
turn on the server.
Now navigate to gmodds > garrysmod > cfg and drag the file titled 'autoexec.cfg' over to your desktop.
In addition, drag the 'server.cfg' file to your desktop. Minimize Your FTP window and open the 'autoexec.cfg'
file. Paste in this code, replacing the sample image URL with your own:
You may be suprised to find that your server configuration file is completely blank. No worries, simply
copy and paste the above server information into your own file and adjust accordingly. The two primary
items to look at are 'hostname' and 'sv_password'. You will need a name so people can find you and if you
would like to host a private server for just yourself and friends you will want to password protect it.
ADDON COLLECTIONS
Login to your Steam Account. Hover over the word 'Community' on the top menu and then click
'Workshop'. You should see Garry's Mod on the front page (due to popularity). Click the game image,
which will then bring you to the Garry's Mod addons home page. On the third menu down (across from the
search field) hover over 'Browse' and then click 'Collections'.
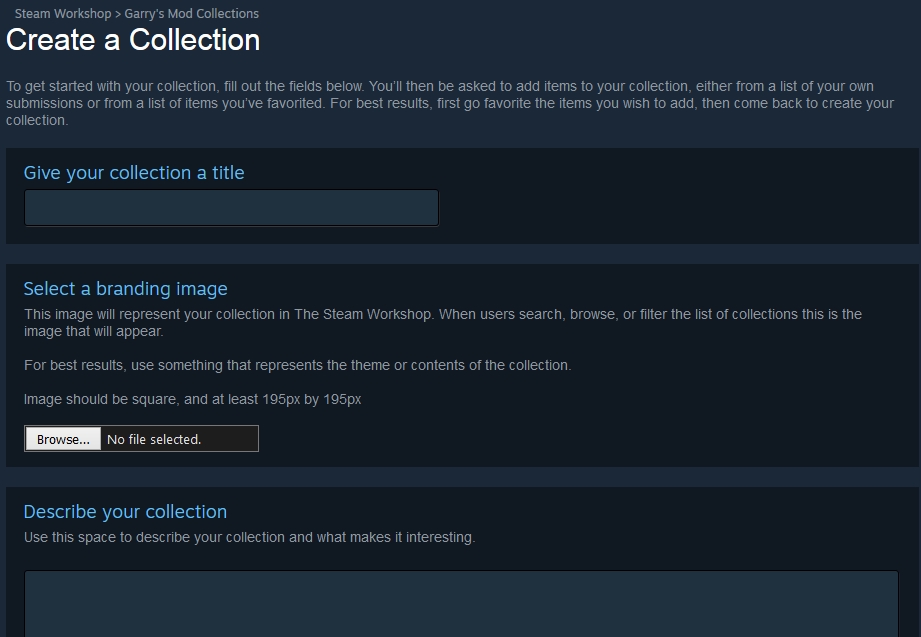
Click on the blue
button located in the right column. This will open the following page, which you can now proceed to fill out:
After you have entered the required information, feel free to browse through the myriad of
Garry's Mod addons and select those that best fit your new server's environment. The ones that you like
can be added to your collection by clicking the handy button located beneath each addon's image slider.
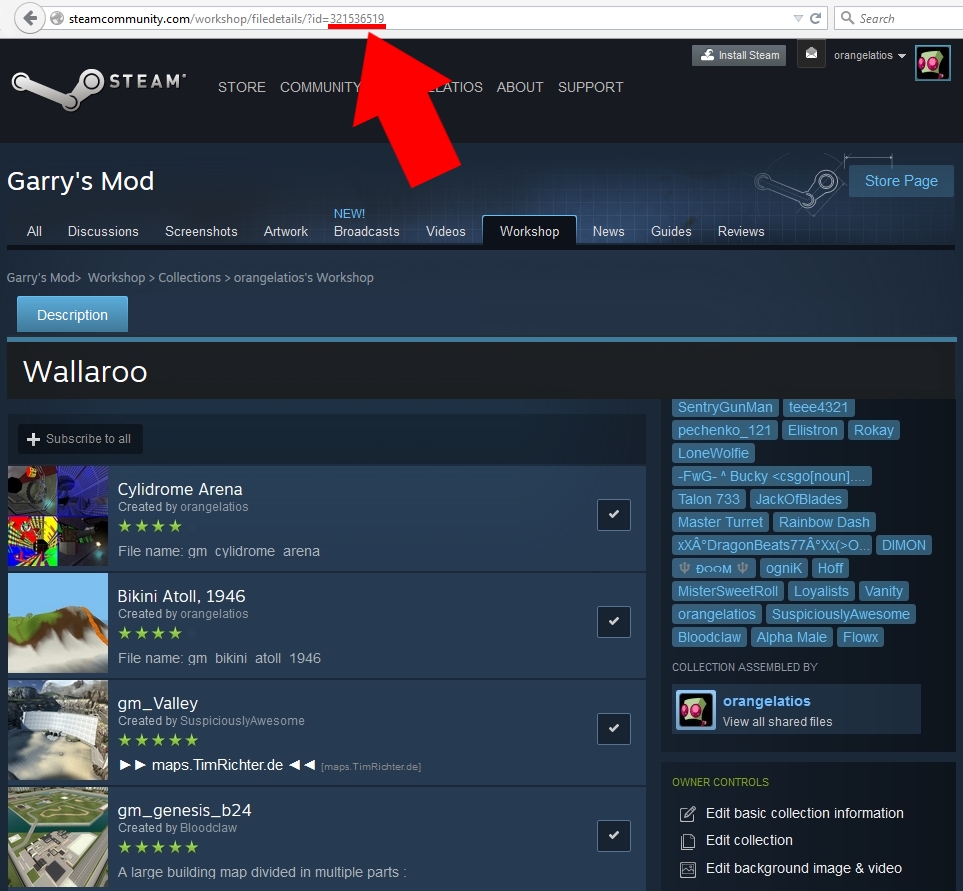
Once your collection is ready, grab the collection ID and paste it into your notes for future reference.
The ID is located in the address bar, as demonstrated in this image:
One issue that every server owner had encountered is collection addons missing from players' Steam
accounts that join their VPS. You can encourage players to subscribe to specific Mods to enhance gameplay
but you can't force them. Missing addons result in these players viewing numerous floating error images
during gameplay - not cool.
A simple and foolproof way to combat this is to create a 'workshop.lua' file. Open up notepad and save it as
workshop.lua. Visit steam and navigate to each of the addons you would like on the server, recordering their
ID (see above) as you go along. Open your workshop file and enter each of the addon ID's in the
following format:
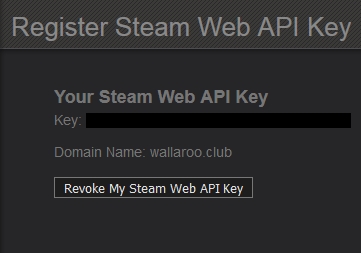
The final thing to do is acquire your Steam API/Authorization key. This will enable you to run your
collection on your server. Visit the Steam API page to get your key. Record this number in your notes for future reference.
Go back to Filezilla. Drag the files you edited titled 'server.cfg' and 'autoexec.cfg' over to
gmodds > garrysmod > cfg on the VPS. Refresher: The server file contains your server name and password.
The autoexec file runs the loading screen. Drag the 'workshop.lua' file to gmodds > garrysmod >
lua > autorun > server. All your files are now in place and you are ready to start the server.
STARTING THE SERVER
Login to PuTTY once again. Navigate to the directory where you moved your Garry's Mod server, as in this
example:
cd /home/gmodds
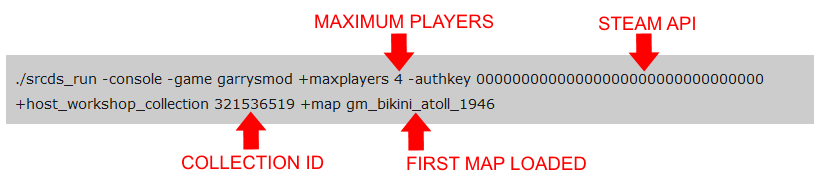
The start command we run will include your Steam API, your addons collection ID and some other
standard information. Go ahead and paste a modified version of the below code into PuTTY:
The server is now running and ready for players. One last thing to do before
having fun: we must set you up as a SuperAdmin. In PuTTY enter the following code and hit enter:
ulx rcon ulx adduser (your game name) superadmin
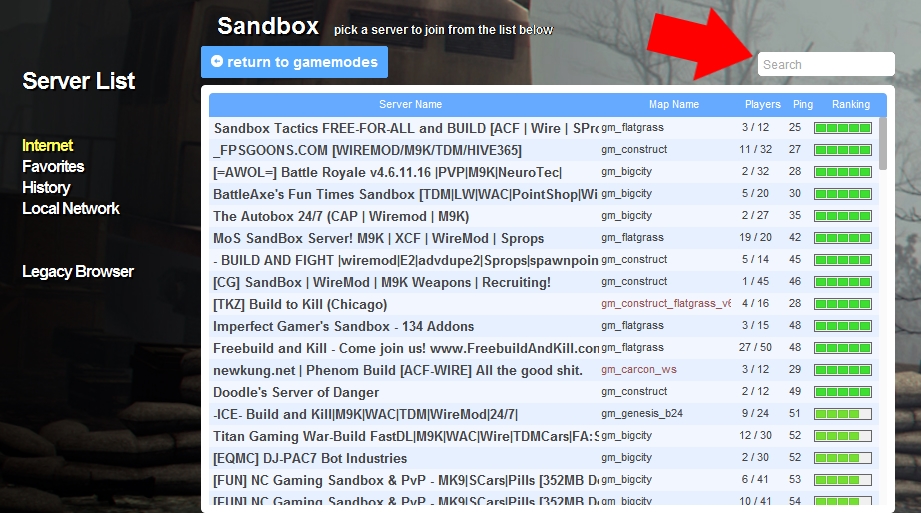
You are now a SuperAdmin. Leave PuTTY and launch Garry's Mod. Search in the Sandbox servers list for your server.
Click on it, enter the password and you should see your loading screen. All of your collection addons should
also be loading. This can take a few minutes initially, depending on the number and size of the addons.
Once you are in the server you should immediately see the ULX admin screen that you customized.
Go ahead and close this. Hit 'y' to open the chat window and type in !menu. The admin menu will now be displayed.
From here you can add other players, ban players and change maps.
Shut down PuTTY. You will now see that your server has shut down. To keep your server running indefinitely,
you will need to add on more step in the server startup process. After logging into PuTTY, enter this:
screen
This will keep the server operating. You can then proceed to finish starting the server. To reboot
the VPS and stop all servers, type the following into putty at any time:
reboot -f
ENTERING YOUR SERVER
You can locate your Garry's Mod server by first launching the GMOD game application and then selecting
'Find Multiplayer Game'. You will be taken to a page with a list of server categories. Click on
'Sandbox' and then enter your server name in the search field above the list of active servers.
If your server is not found then enter your server IP in this format: 000.000.000.000 - this is
certain to work.
UPDATING YOUR SERVER
Updating involves one easy step: Login to the server through your CMD interface and enter this line of commands: