This tutorial will show you how to add content to the seven ArmA 2 maps included with the game:
Utes
Chernarus
Shapur
Takistan
Zargabad
Desert
Proving Grounds
In addition, you will be shown how to import third-party content into your map project from sites such as ArmAHolic and
OFPEC.
Begin by launching Arma 2.
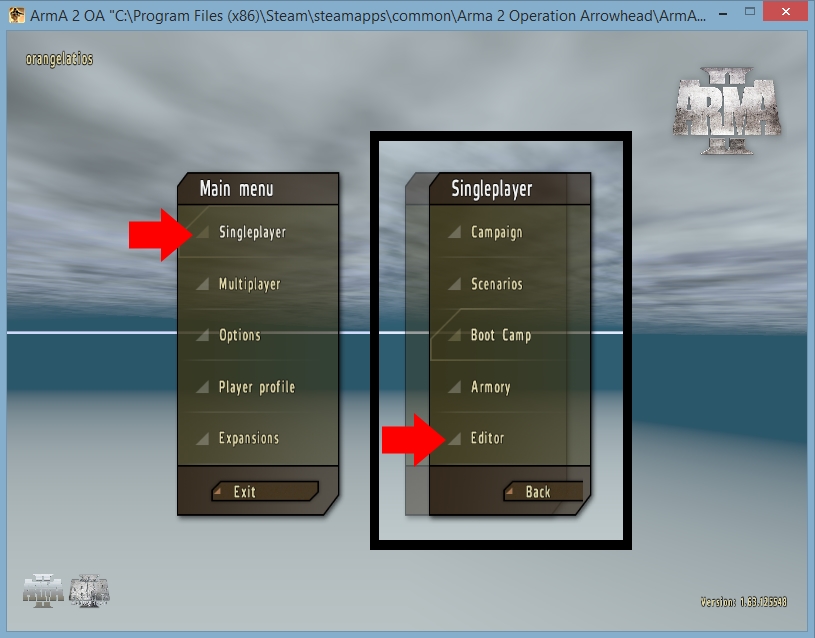
Click 'Singleplayer' and then click 'Editor'.
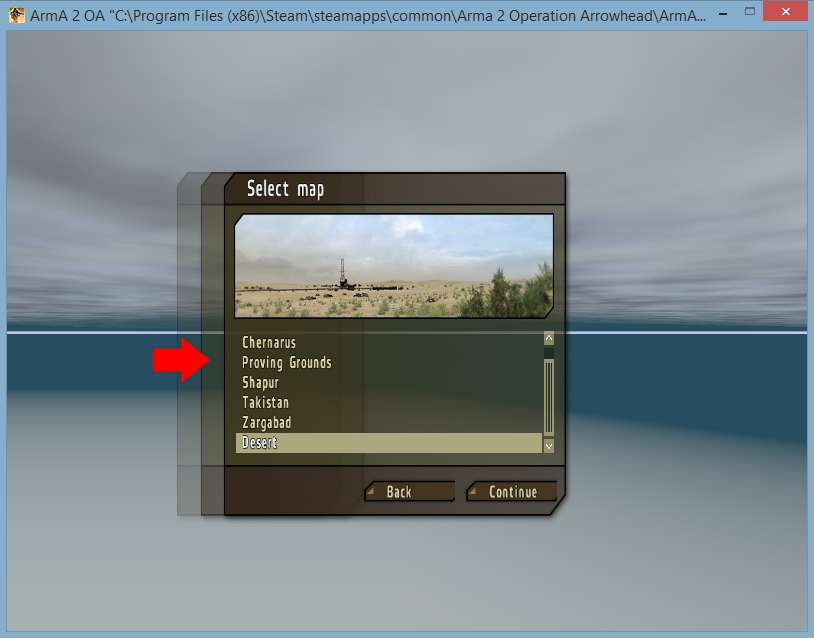
Select a map you would like to use for your mission. You should definitely consider the layout
of the land when selecting a map:
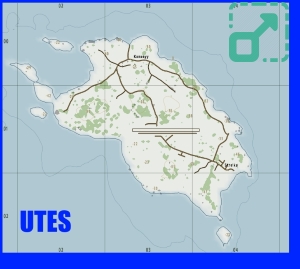
Utes: A small, quaint island surrounded completely by water. There is no access to additional land masses off the isle.
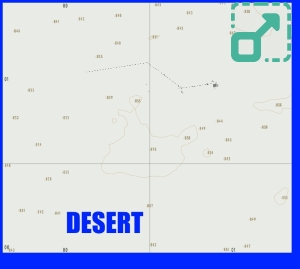
Desert: Exactly that. Dry, arid and filled with miles of rolling sand hills. You can, however, see mountains in the distance which breaks up the visual monotony of the landscape.
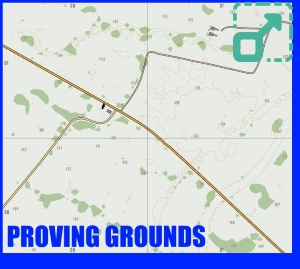
Proving Grounds: A nice area to test out your skills using a smaller scenario. The land is parched, dry and empty
except for a few areas filled with junked-out homes and vehicles.
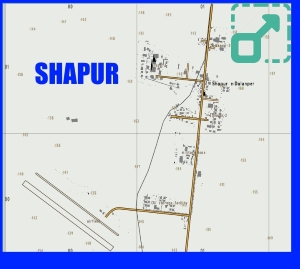
Shapur: An extremely compact map consisting of a few roads, an airfield and some densely pack residential areas. This is ideal if you you would like to design a mission in a highly contained area.
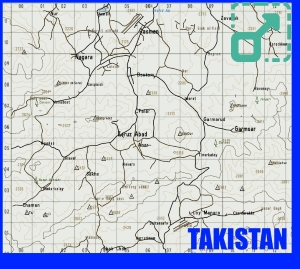
Takistan: This is a large map with miles of meandering roads cutting across rugged terrain and villages spread out over great distances. There are a few airfields you can utilize and even a couple small lakes.
Zargabad: This is a large capitol city with a huge population density (it's up to you how dense) filled with appealing
architecture including a large mosque. Perfect for large campaigns focused on controlling an enemy occupied city.
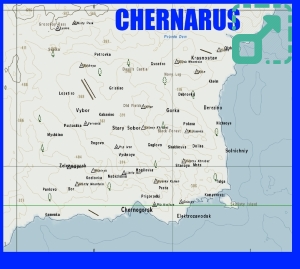
Chernarus: This map is located along the ocean coast and encompasses a vast region of both land and water. There
is a long, sprawling highway system and many villages, each with its own personality and flavor. This map is perfect for missions
requiring the use of large areas of both land and water.
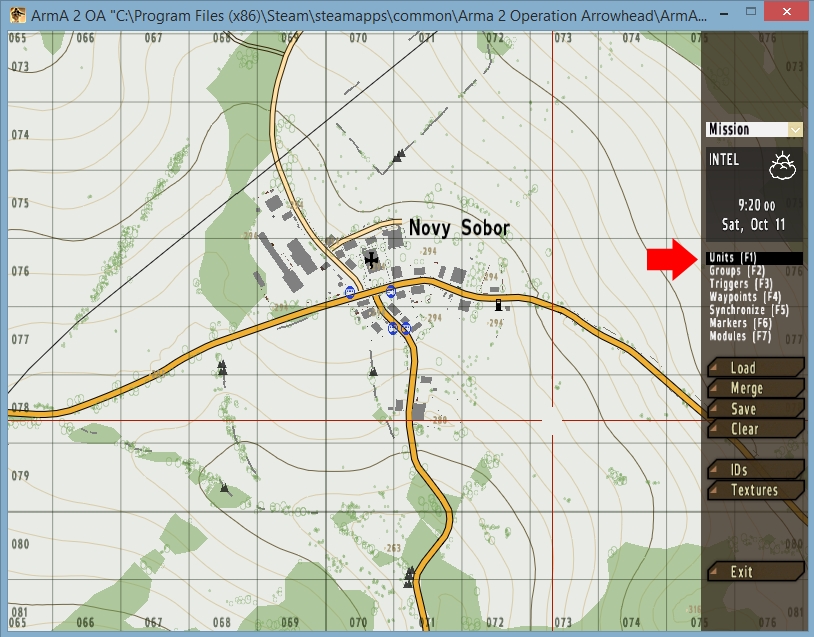
Once you have selected your map, you need to place down a player. This soldier will be used both by future players adventuring on your map and by you so that you can enter the mission to review your work as you edit.
Click on the 'Units' link located on the right sidebar.
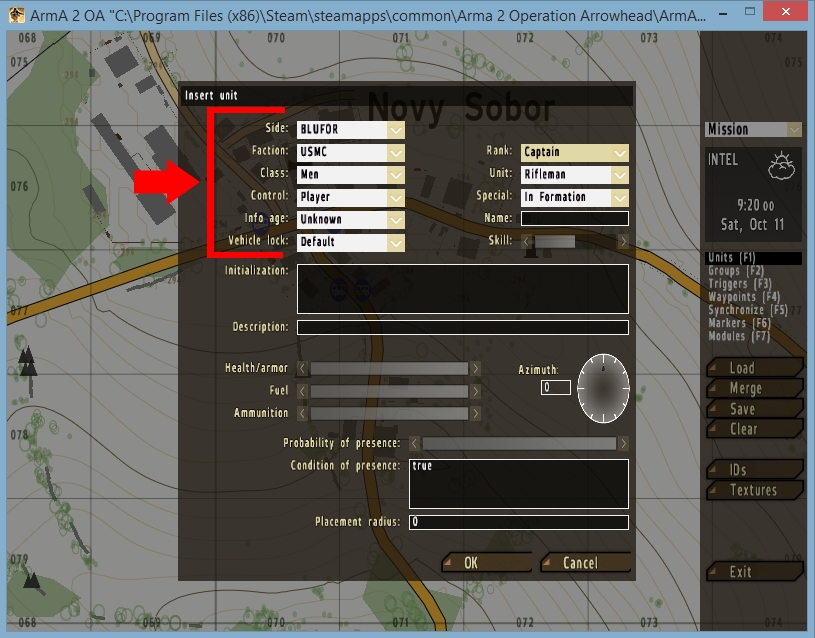
A window will open up with pre-populated player information on the top. You may adjust it as you wish
but make sure that the 'Control' field is 'Player'.
If you would like to make the the player American/Western European then select 'BLUFOR'. 'OPFOR' signifies that the character is from Russia or an Eastern Bloc country.
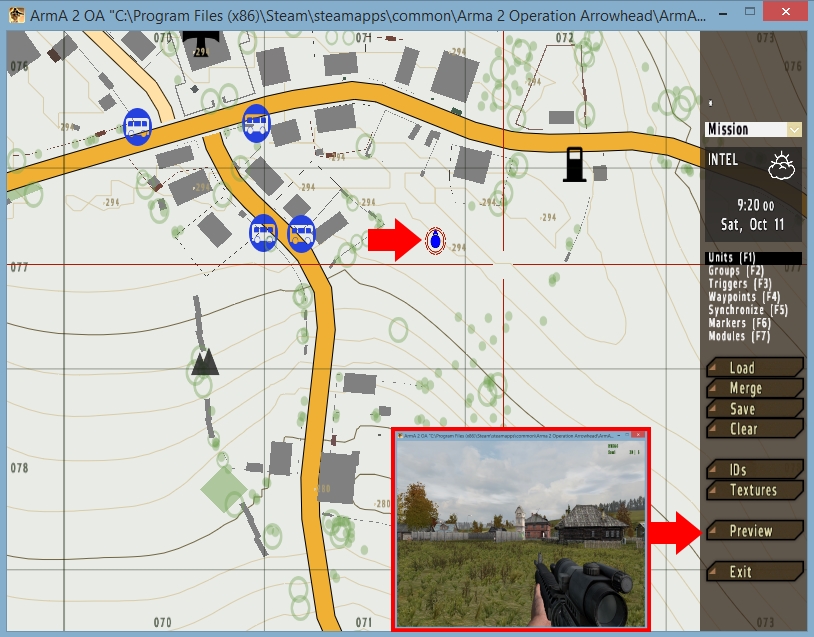
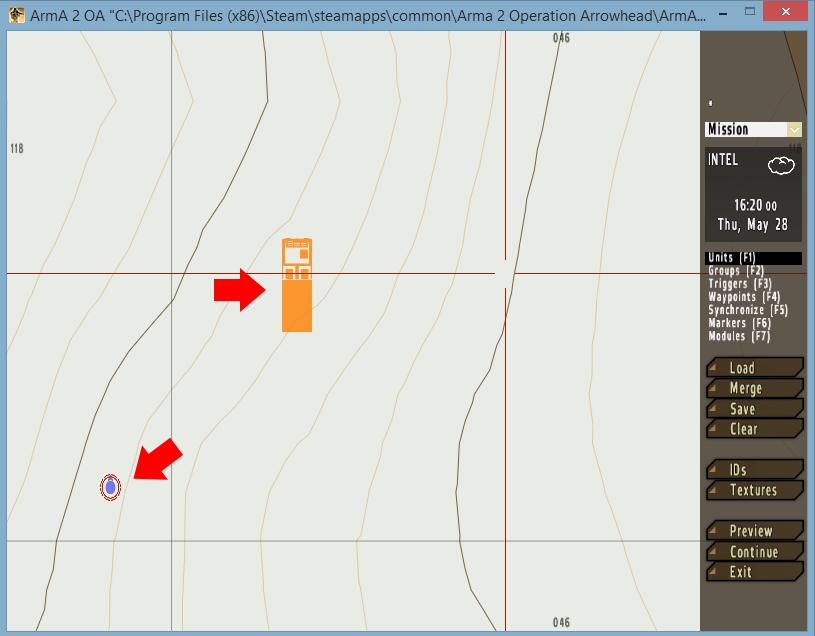
An icon will appear (blue or red) on the map indicating where the player has been placed. This is
your initial spawnpoint for the mission. If you would like to move the icon, simply left click on it and drag him to the desired
location. When satisfied, click the 'Preview' button on the lower right sidebar and enter the mission to review the area.
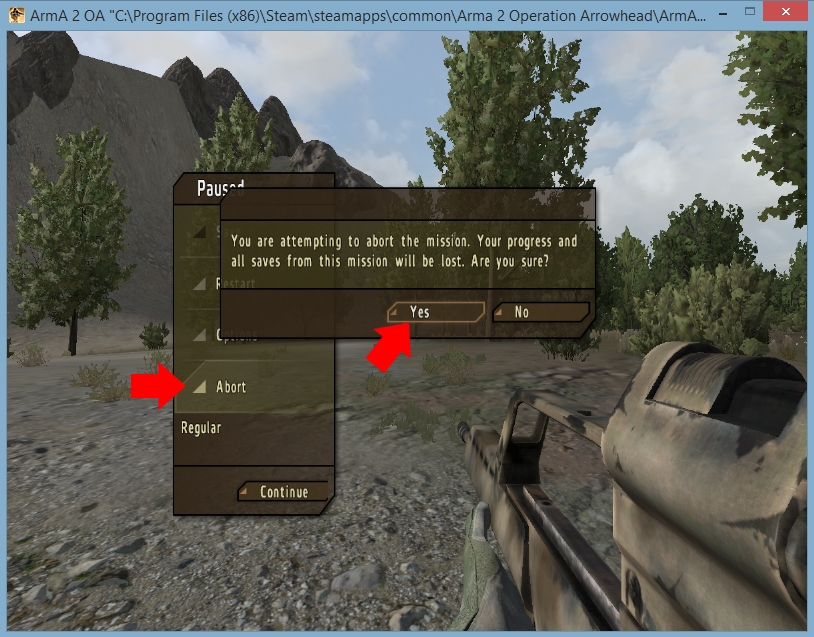
When you are ready to return to the Editor, hit Escape. A menu will appear. Click on 'Abort' and then
click 'Yes'. You will exit the mission.
(Continued)
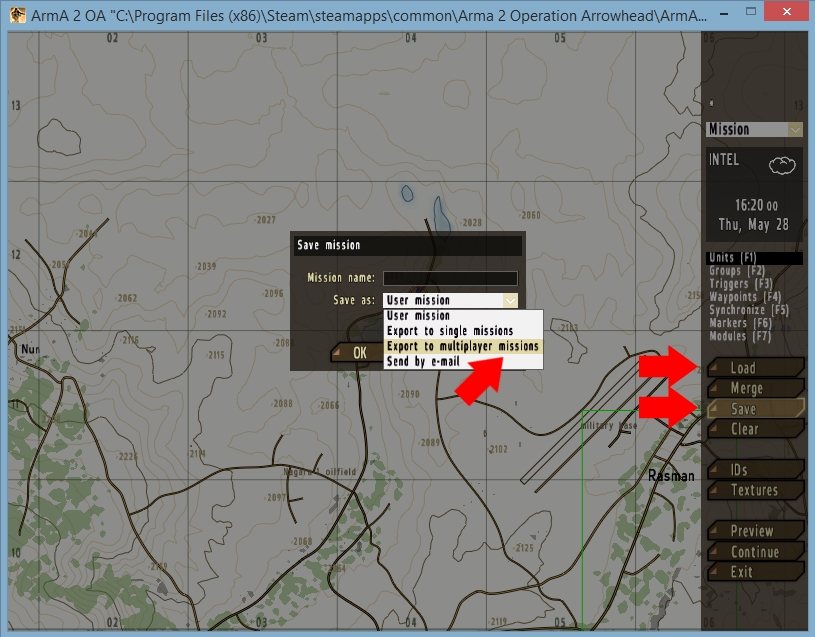
This is an ideal time to save your mission. Click the 'Save' button on the right sidebar and a popup will appear. Type in a name in the 'Mission name' field and then select 'Export to multiplayer missions' from the dropdown.
The mission is actually playable at this point via Multiplayer and can be shared with friends. As you continue to develop your mission repeat this saving process. The most current copy of the mission will be available to play in multiplayer.
To access your mission at a later time, reenter the Editor (as shown above) and click the 'Load' button on the right sidebar. You will be provided a list of all your missions. Select the one that you want to edit and it will quickly load.
Your missions are stored on your computer in either:
C:\Users\User\Documents\ArmA 2\missions
or
C:\Users\User\Documents\ArmA 2 Other Profiles\[YOUR-NAME]\missions
People, Objects and Addons
Between the official ArmA 2 items and third-party addons, there is a cornucopia of cool objects to add to your mission.
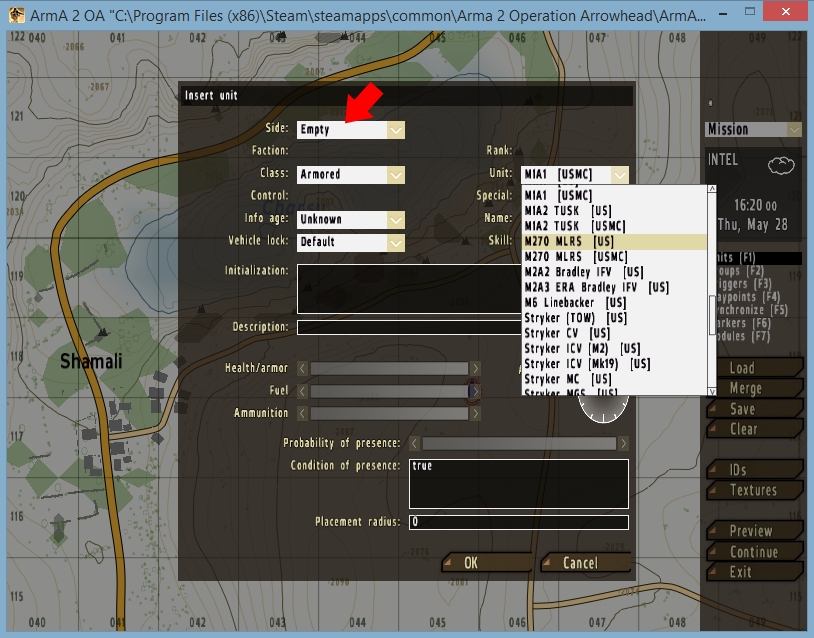
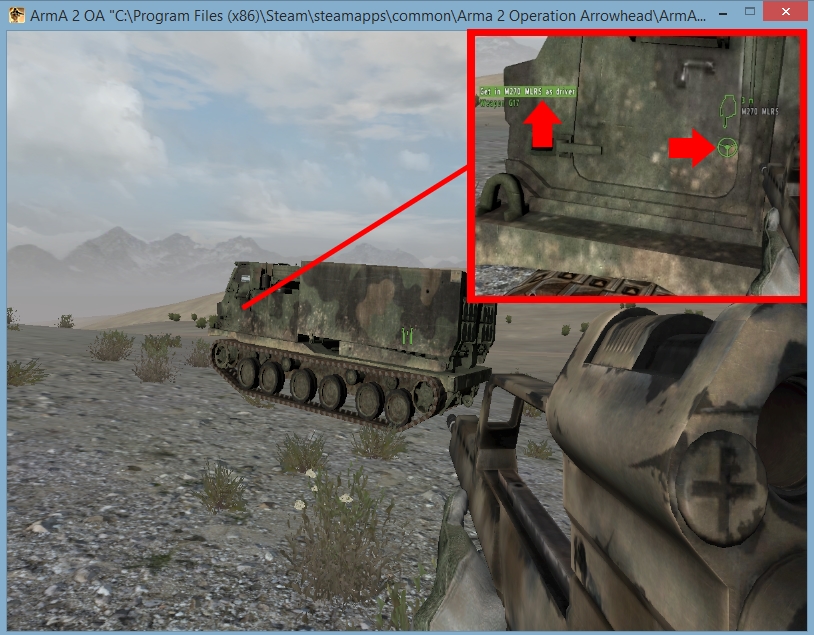
Let's create a sample armored unit, the United States M270 MLRS. Just like when you created the player, go ahead and click the 'Units' button on the right sidebar. In the side field you have two choices: An occupied or unoccupied vehicle.
If you would like it occupied then select one of the many factions from the dropdown. Otherwise select 'Empty'. Under 'Class' select 'Armored'. From the 'Unit' dropdown click on 'M270 MLRS (US)'. Click 'OK'.
You will see that an orange icon shaped like a vehicle has appeared on the map near your player. Just like the player, all objects can be moved by left clicking on them and then dragging across the map. To rotate the object, hold down the shift key, left click it and then turn the mouse. To delete, hover over the object and hit the Delete button on your keyboard.
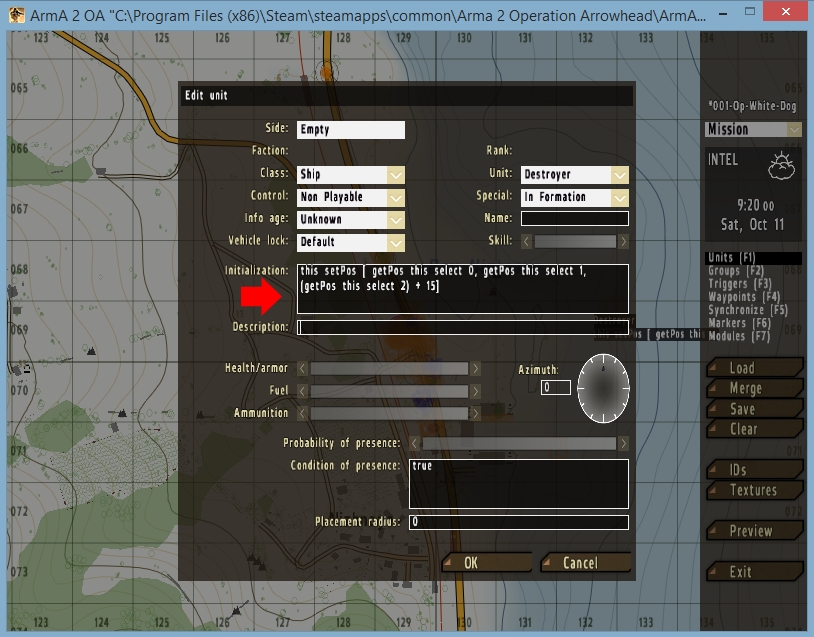
Since we are working in the ArmA 2 2D Editor (there is also a 3DEditor available - to be discussed in a future article) height would seem problematic*. However, with a little ingenuity we can overcome that barrier. We wil add some code that tells the game at what height we would like the object.
*Height can be an issue with ships which tend to sink in the ocean. This code will resolve that dilemma.
this setPos [ getPos this select 0, getPos this select 1, (getPos this select 2) + 15]
Place the above code in the 'Initialization' field of the unit. Adjust the number '15' to change the height.
Click the 'Preview' button on the right sidebar and enter the mission. Your empty vehicle will be positioned near you. Approach it and scroll your mousewheel. Options will appear in green, one being to enter the M270 MLRS as the driver.
A great resource for third-party addons created by the ArmA community is ArmAHolic. As seen on their website (image below) the addons are broken down into eight categories: Units, Weapons, Vehicles, Islands, Sounds, Objects, Miscellaneous and Replacement Packs.
Each download comes in a .pbo file format, just like the file for the mission you are currently creating located in the MPMissions folder (multiplayer). Sometimes addons will be organized in a folder that begins with the '@' sign.
An example would be a special forces addon folder with the title '@special_forces'. Drop these folders directly into the root of your ArmA 2 Operation Arrowhead folder which is located here:
C:\Program Files (x86)\Steam\SteamApps\common\Arma 2 Operation Arrowhead
You will now need to launch ArmA 2 OA and activate the addon. Here are some instructions with pictures that demonstrate the process (see 03 thru 05).
Most addons do not come 'pre-packaged' like this so you will need to create your own modfolder. You can title the main folder anything you wish as long as it starts with an '@'. Place a folder inside this one and title it 'addons'. Then drop your addon files into the second folder
You can also drop the addons directly into the 'Addons' folder; however, this is not encouraged. I suggest renaming each of the files you download with a prefix indicator (ex: aaa-truck.pbo, aaa-car.pbo, aaa-airplane.pbo) to keep them blocked together in your Addons folder. The prefixes (i.e. aaa) can be dates, website names or any system you choose to catalogue your addons.
Here is the folder path:
C:\Program Files (x86)\Steam\SteamApps\common\Arma 2 Operation Arrowhead\Expansion\Addons
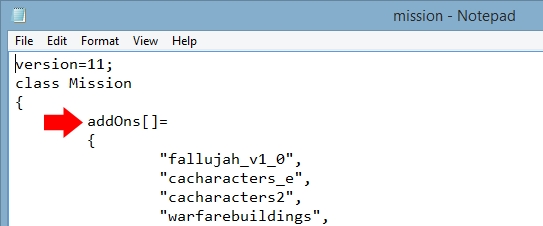
It is highly recommended that you test all Addons in a test mission. If you do not care for an Addon you can then delete it from your Addons folder. If you import an Addon you do not want into your Master Mission and then delete it, the mission will not open, as the Addon information is locked into the mission.
To remedy this, open your mission.sqm file and look for a line near the top that reads:
After the next open brace you will see your list of addons. Simply delete the missing addon from the list and save the file.
Also, please be aware that many addons are dependent upon one or more additional addons. This will be stated on each addon description page.
All addons used in your mission will need to be shared by the other players. When you have compiled all the addons you are planning to use, zip them up, upload them to a file sharing site such as Dropbox and send each person the download link.
written by RJ Wattenhofer