General Blender Commands
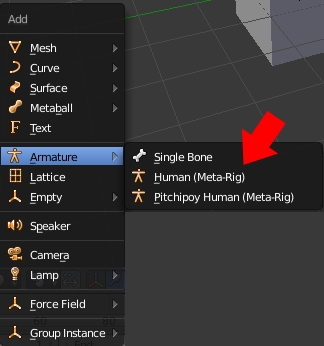
Add Armature
Shift +
A
> Armature > (var A*)
*
--- Single Bone
--- Human (Meta-Rig)
--- Pitchipoy Human (Meta-Rig)

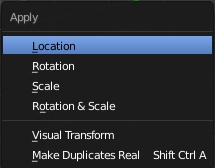
Apply Transformation
Ctrl +
A
> (var A*)
*
--- Location
--- Rotation
--- Scale
--- Rotation & Scale

Parent Mesh to Armature
01 Right click mesh object, hold down Shift and then right click the armature.
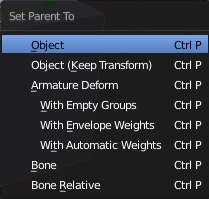
02 Ctrl +
P
> (var A*)
*
--- With Automatic Weights
--- Bone

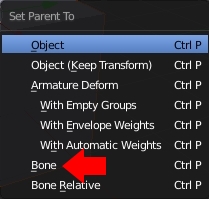
Parent Mesh to Specific Armature Bone
This is used to parent additional meshes to an armature after the primary mesh has already been parented. EX: Soldier mesh has been parented to Meta-Rig and now you would like to parent rifle to wrist bone.
01 Right click the armature and then switch to 'Edit Mode'. Right click the target bone.
02 Change to 'Object Mode', right click the new mesh, hold down Shift and then right click the armature on any bone.
03 Ctrl + P > Bone

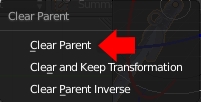
Clear Parenting
Click object you would like to clear and then:
Alt +
P
> Clear Parent

Select Large Area
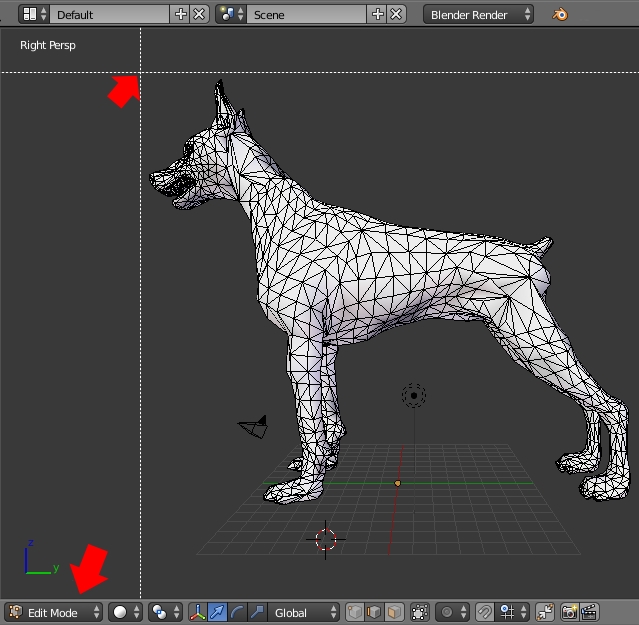
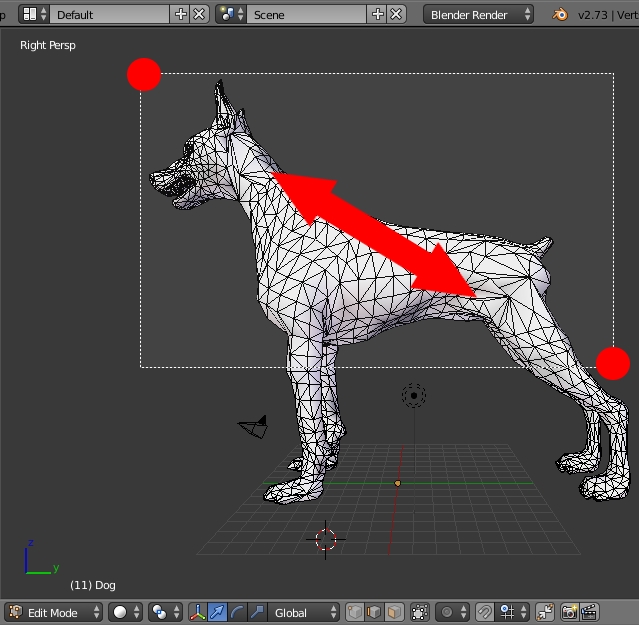
Click B and then left click in the upper left-hand area of the Blender viewport & drag SouthEast.


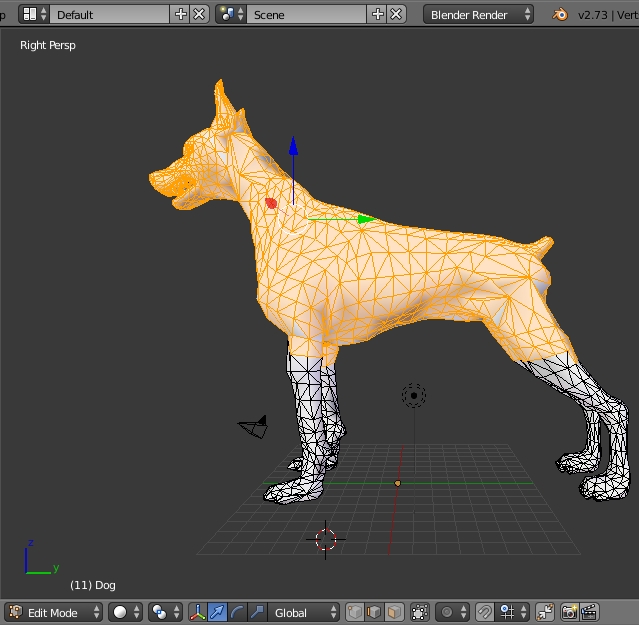
When the desired area is covered release the mouse button. Editable area on the mesh will turn orange.

Select/Unselect All
Toggle A
to select and unselect all faces of a mesh while in Edit Mode.
Join Two or More Meshes
01 Right click first mesh object, hold down the Shift key and then right click the second mesh object.
02 Ctrl + J
Unlike parented objects, joined meshes cannot be unjoined.
Add material to model (texture)
RE: blender.org
Click on header menu drop down and change 'Blender Render' to 'Cycles Render'.

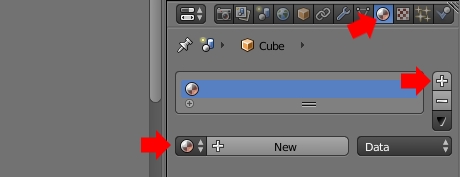
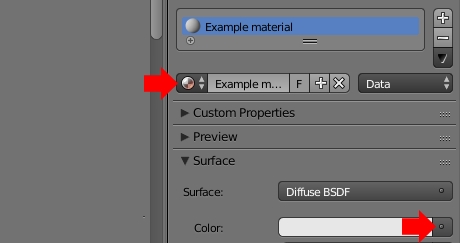
Click on Material tab (right column), click [Add a new material slot] and then click 'New' [Add a new material].

Rename the material [Material datablock] and click 'Color'.

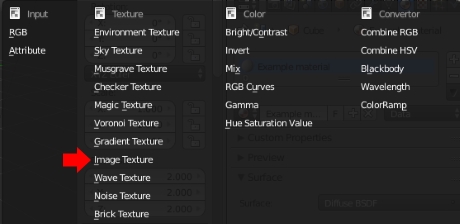
Click 'Image Texture'.

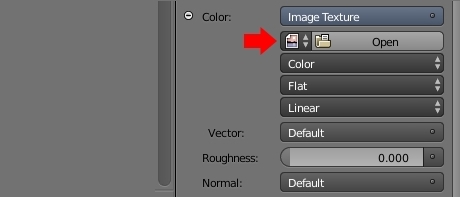
Click 'Open' and proceed to upload your texture. Textures are typically in .tga format for games.

Switch to 'Edit mode' (button located beneath viewport) and then click the button directly to the right of that to change to 'Texture' [Viewport Shading]

Toggle the 'A' key to make sure all faces of your mesh are selected - everything should be highlighted orange. Then click the 'Assign' button (back in the right column).

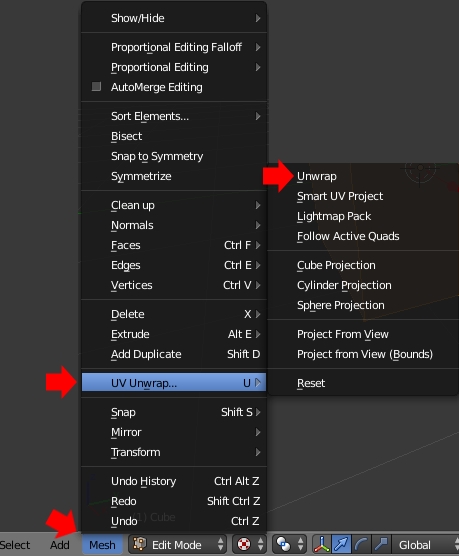
Click 'Mesh' and a menu will appear. Hover over 'UV Unwrap...' and then click 'Unwrap' when the submenu pops up.

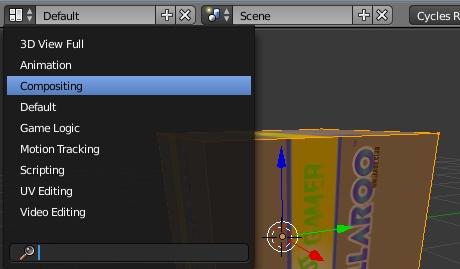
It is possible your texture will look correct at this point (EX: applying a square texture to a perfect square model). If it is not aligned correctly then click the button next to the word 'Default' (header menu) and then select 'Compositing' from the drop down.

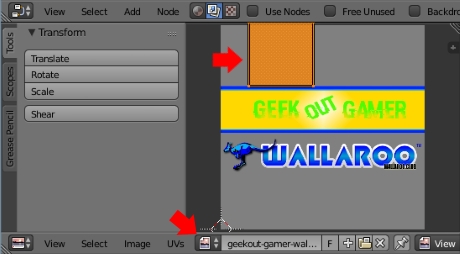
Click the image icon on the bottom menu and import your texture. Use the tools on the left: (Translate (move), Rotate, Scale and Shear to manipulate the orange square until your image is perfect.
You can view your changes to the mesh surface by clicking on 'Texture' [Viewport Shading] in the window to the right.

Change Object Origin
This will change the rotation/pivot point.
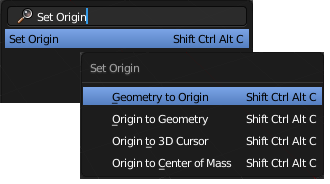
Right click the object, click the Space bar and then type in 'set origin'.
Choose the desired option (1-4) from the dropdown menu.
