written by RJ Wattenhofer
This tutorial will explain how to clear & flatten an area in your Minecraft World and then import a schematic
using the world editor MCEdit. If you do not have MCEdit already installed on your computer, please visit our
Resources Section where you will find a link to download the program.
In addition, on the Resources Page you will see a link to MCSchematics, an excellent source of member
submitted Minecraft schematics that you are free to download and use.
MCEdit is available in 32-bit and 64-bit. If you are not sure which version to download,
open your computer's System Properties via the Control Panel and check what you are running.
Follow the steps below to successfully import your schematic:
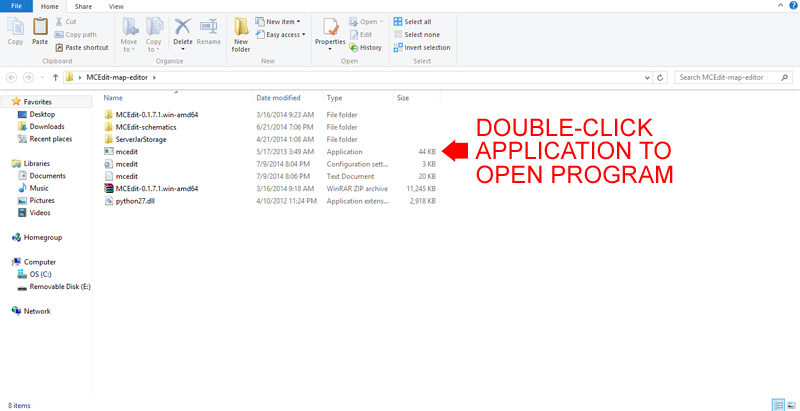
STEP ONE: After downloading MCEdit, move the .zip file into a new folder and extract the files using a
program such as WinRAR. The contents should be exactly as seen in the image above. Double-click the
application to start up the program.
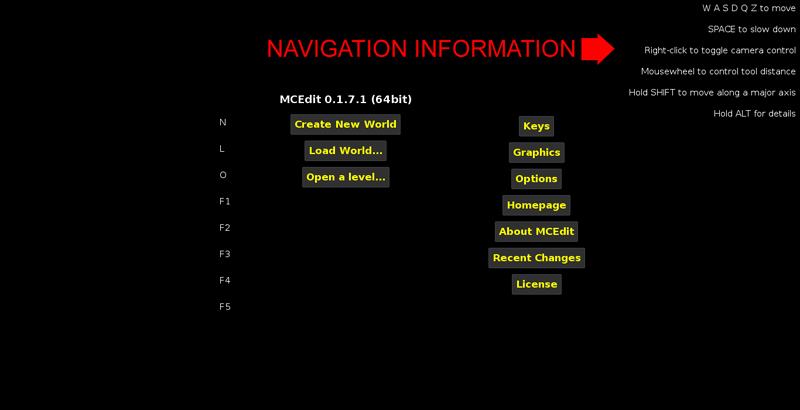
STEP TWO: Once the program is open, you will have the option of creating a new world, loading a pre-existing
world or opening a level Dat file. For the purposes of this article, we will load a world.
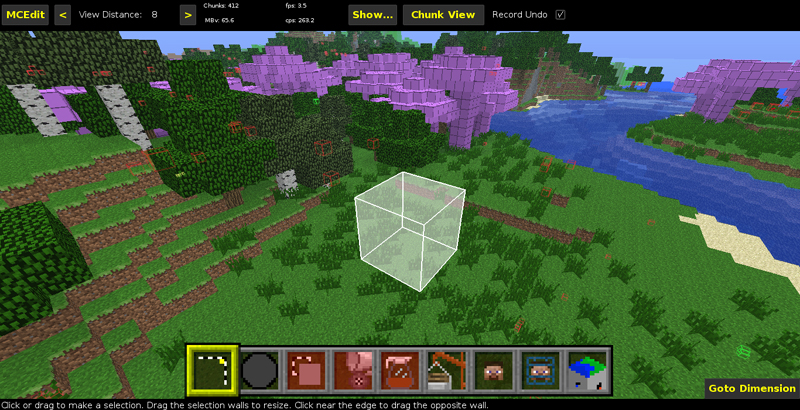
STEP THREE: Your Minecraft world is now open and ready to edit. It will take a bit to get used to the
graphics, but once you do you'll have no trouble recognizing objects. An example is the purple colored
trees. Any blocks introduced into Minecraft after the latest version of MCEdit will appear this color.
No worries: You can edit/import them but you will need to double-check they are positioned correctly
in-world if you manipulate them in any way. Similarly, items such as dispensers will not rotate so you
will need to replace them in-world after importing a schematic you have rotated that includes dispensers.
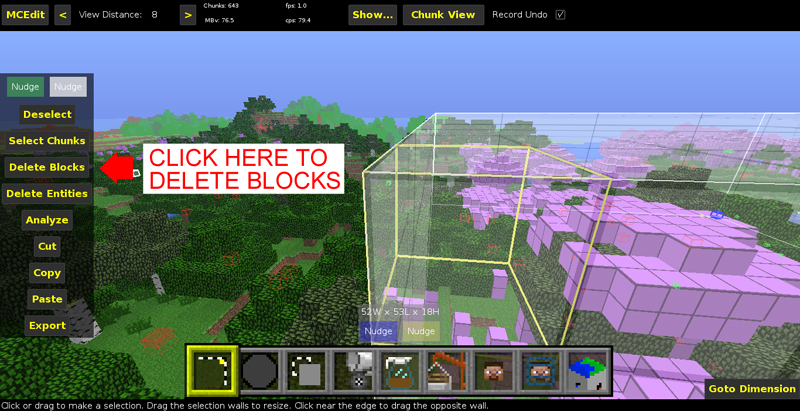
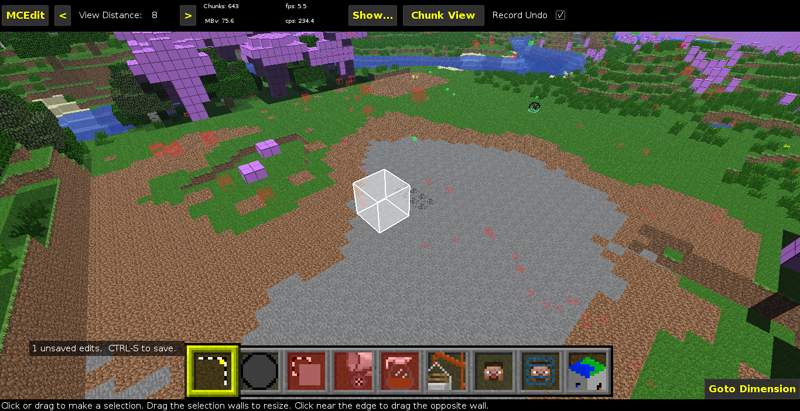
STEP FOUR: The area of our world in which we want to place our schematic is rather uneven, so lets flatten
it out. Using the W, A, S, D, Q, and Z keys, navigate the white box into a corner of the area we are going
to clear and place it flush on top of the lowest level of grass. Left click and hold down the mouse
button. Then using the previously mentioned navigation keys (continue to hold down the left mouse button),
drag the box out and up until it completely covers the area you would like to flatten. Make sure the box
extends upward and is completely over the tops of the trees. Left click your mouse and then click
'Delete Blocks'.
STEP FIVE: We have leveled the ground out; however, areas of the previously hidden bottom level are now
exposed and not very visually appealing. Let's add some grass.
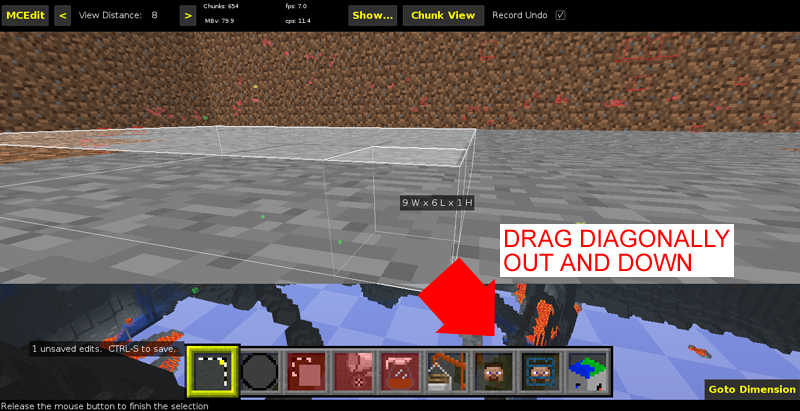
STEP SIX: Once again, position the white box in one of the corners of the cleared area, this time
(using your mouse) moving it down a level so that it is inside the top level. Drag the white box out
and down across the area, making sure that the top layer is covered. The number of blocks you would like
to drag down sub-surface is up to you: Everything the white box covers will be filled with grass.
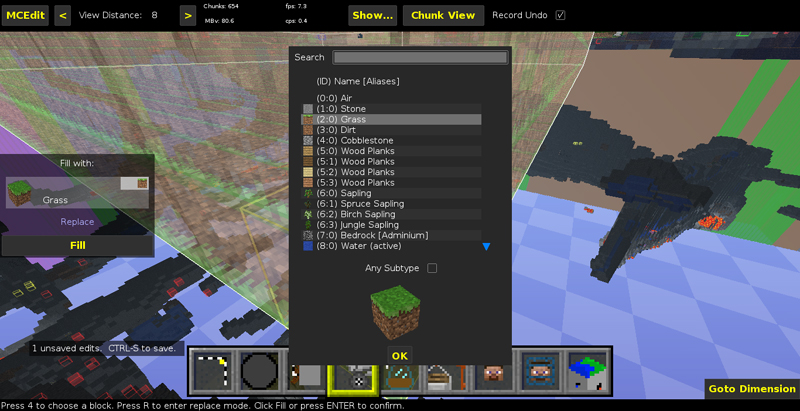
STEP SEVEN: Left click your mouse and type the number four (4) on your keyboard. The yellow box bordering
the first box on the menu bar will now move into fourth position and two screens will open up. From the
item list click on 'Grass', click 'OK' and then click 'Fill'.
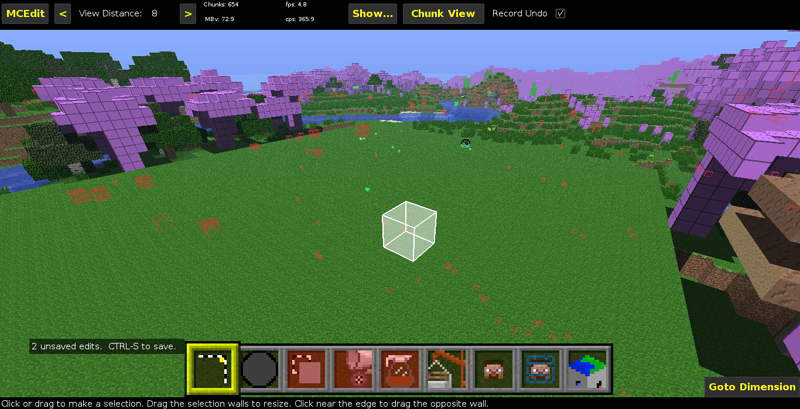
STEP EIGHT: Our flattened area is now filled with grass and looks much nicer. We are now ready to import
our schematic. Select the spot where you would like to place your schematic.
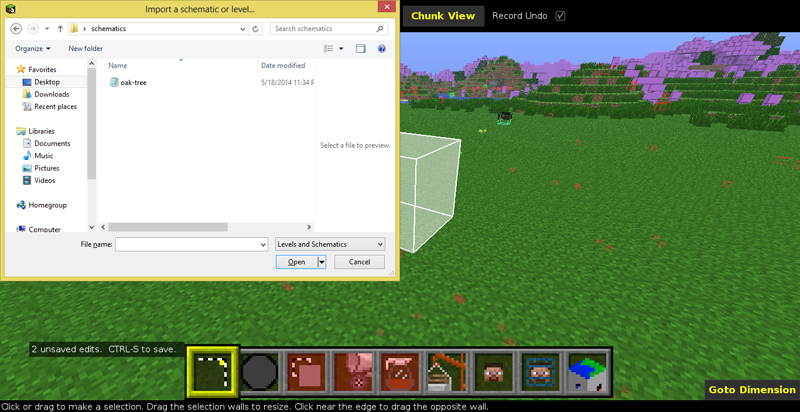
STEP NINE: Type the number six (6) on your keyboard and a new window will pop up. Navigate to the folder
on your computer where your Minecraft schematic is saved and then open it. The example schematic we will use
is an oak tree.
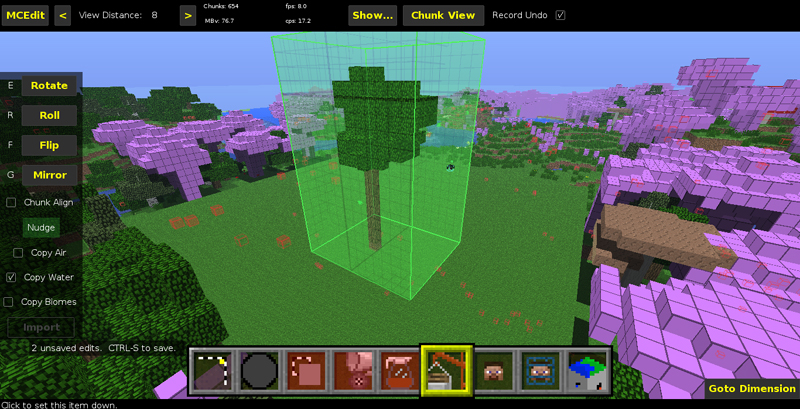
STEP TEN: There are a variety of ways you can manipulate your schematic before you import it, as seen
on the left menu list in the image above (Rotate, Roll, Flip, etc). Once you have placed your schematic
and are satisfied with the positioning click 'Import'.
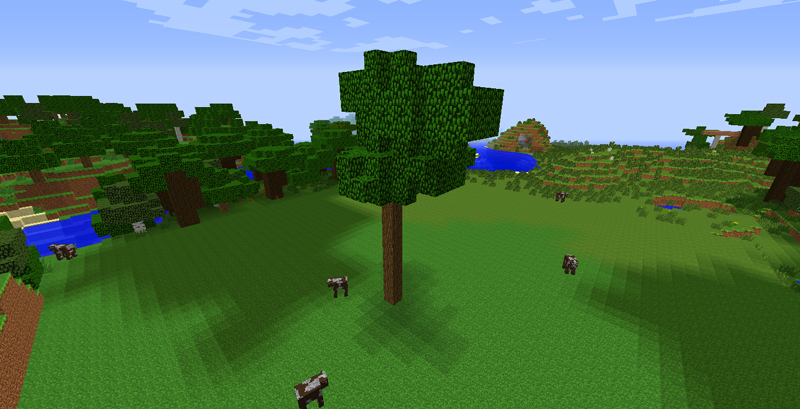
FINAL PRODUCT: Exit out of MCEdit and open your world using the Minecraft launcher. You have successfully
imported your schematic!