Server Computer (HOST)
1) Launch Tunngle
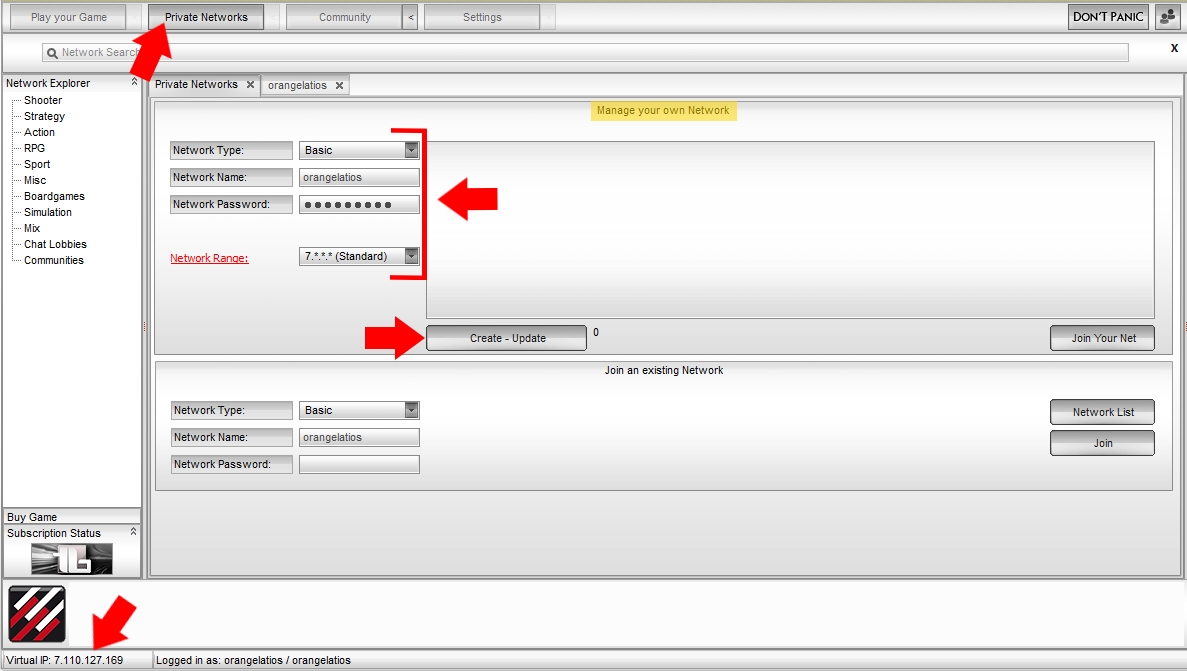
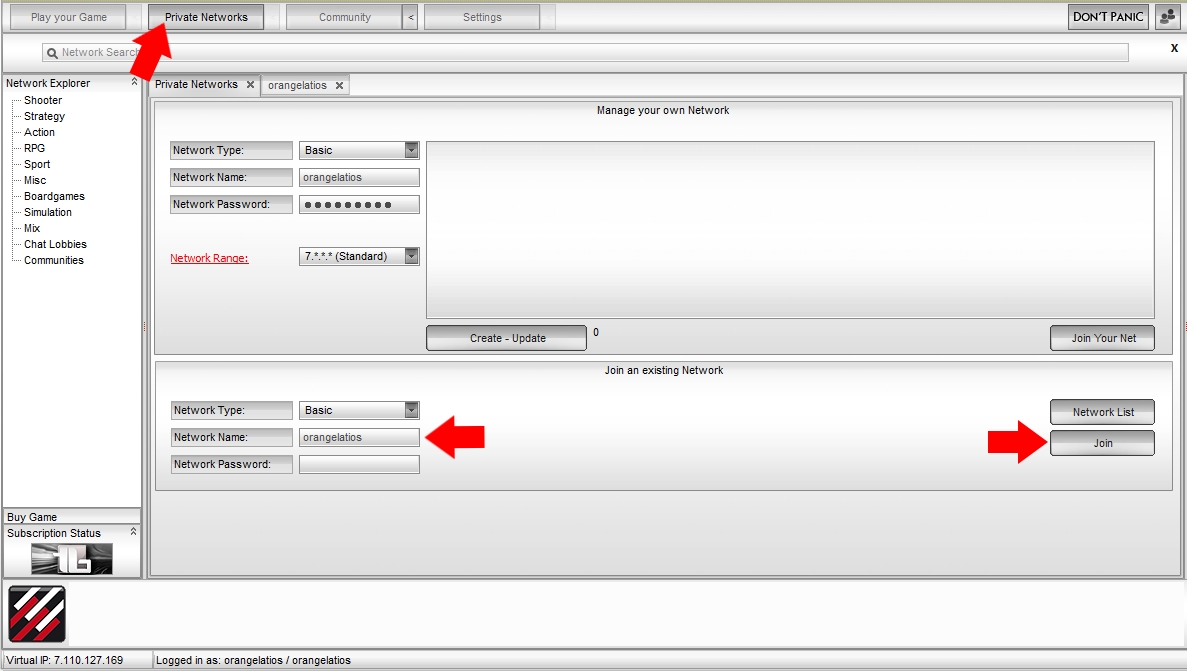
2) Click the 'Private Networks' tab
3) 'Manage your own Network':
Network type = Basic
Network Name=(your choice)
Network password
Network Range = 7.*.*.* (Standard)
4) Click 'Create - Update' button
5) Grab Virtual IP (lower left-hand corner of the screen)
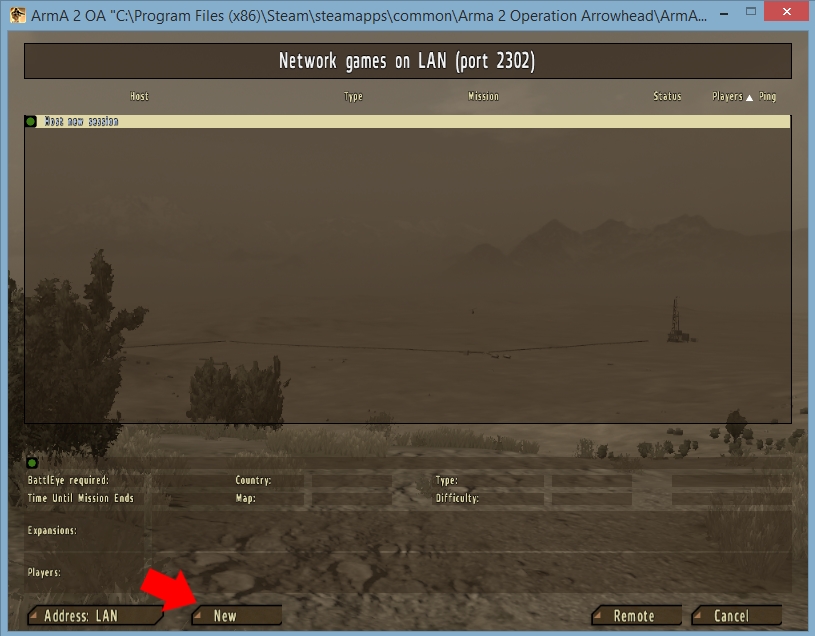
6) Launch Arma 2 Operation Arrowhead via the Steam client. Click on 'Multiplayer.'
7) Click on the 'New' button at the bottom of the screen.
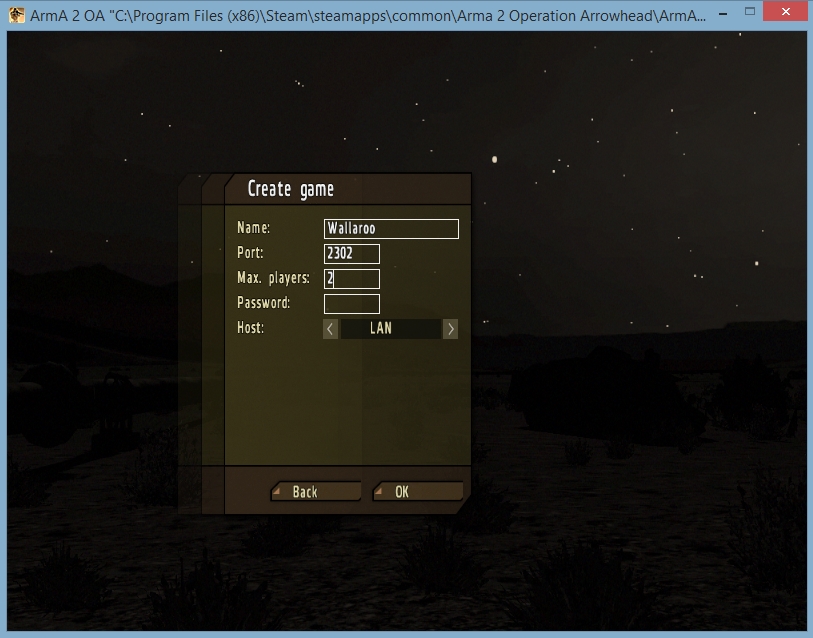
8) Enter server name, maximum players and password. Keep the port at 2302
and the Host as 'LAN'.
9) Click 'OK'.
10) Set up all the details of the mission you and your friends will play.
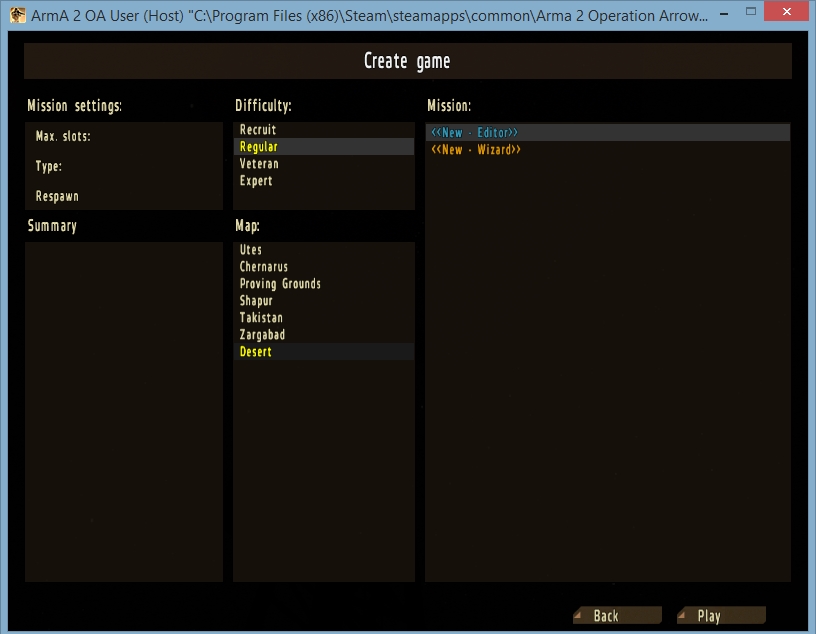
9) Once the details are complete, send the Tunngle Virtual IP address to your friends along with the server name and password.
Player Computer (GUEST)
1) Start by downloading the Tunngle Update and then running it.
2) Click the 'Private Networks' tab
3) Fill in the Network Name & Network Password and then click 'Join'.
4) Retrieve Host's Tunngle Virtual IP address.
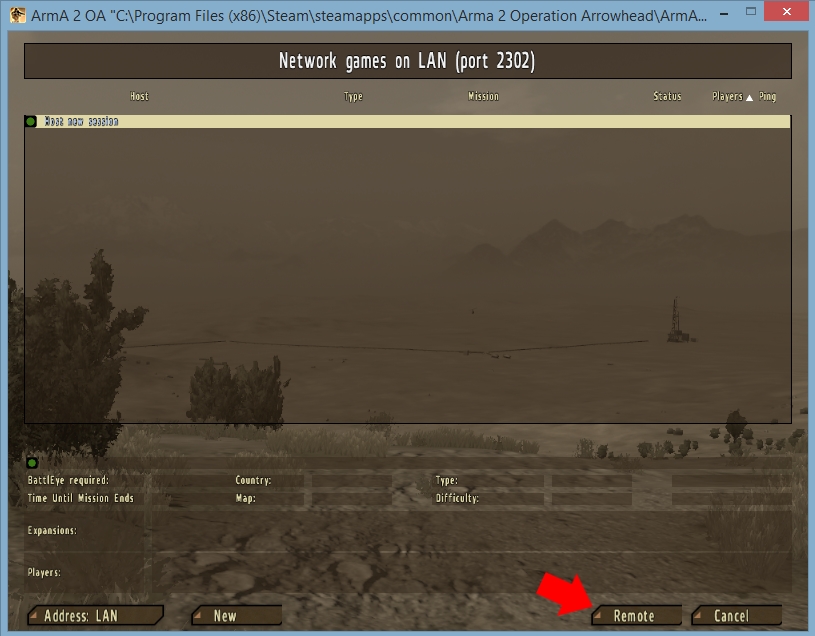
5) Launch Arma 2 Operation Arrowhead via the Steam client. Click on 'Multiplayer.'
6) If you see your friend's server on the LAN games list then double-click it and skip the rest of the steps - you're in! If you do not see it then click on the 'Remote' button at the bottom of the screen.
7) Enter the Host's Virtual IP address. Keep the port at 2302.
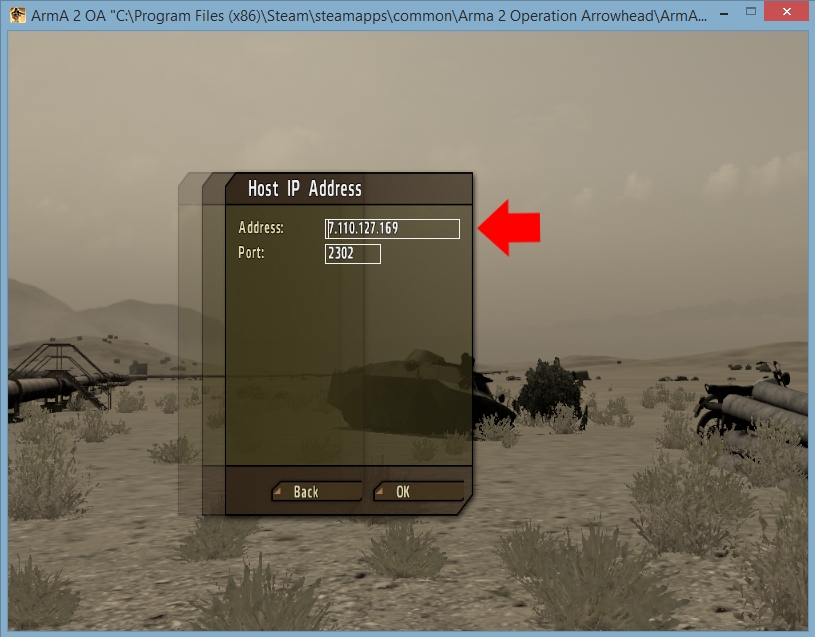
7) Click 'OK' and you're ready to play!


