01
For demonstration purposes, this tutorial will utilize Fallujah, one of the most popular ArmA 2 maps, which was created by Shezan74.
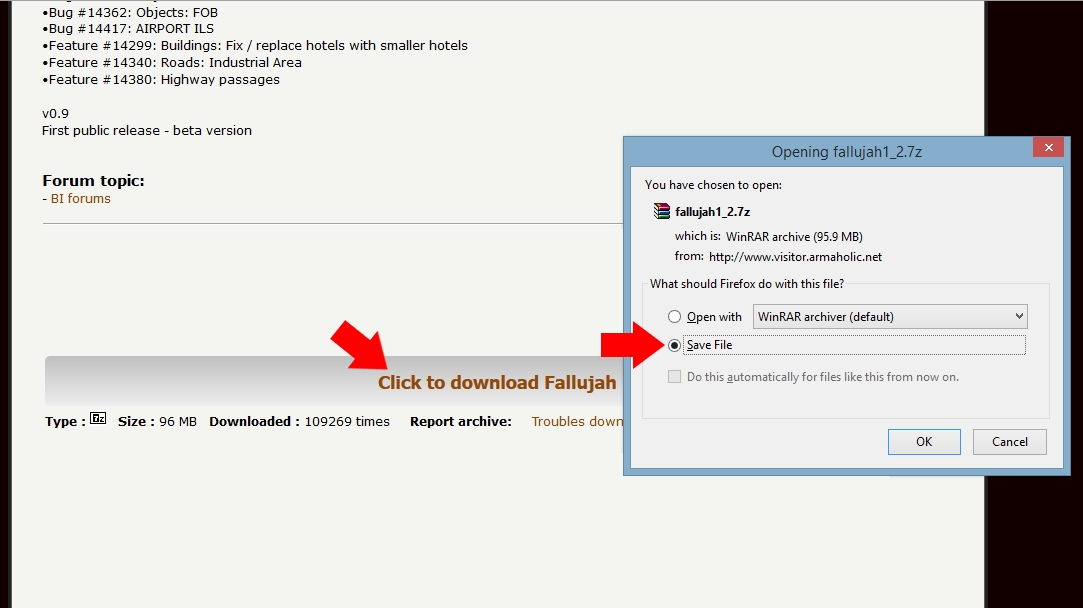
Click the link to open up the ArmAHolic website page for the map. Scroll to the bottom and click on 'Click to download Fallujah'. Click 'Save File' on the popup and then click 'OK'.
02
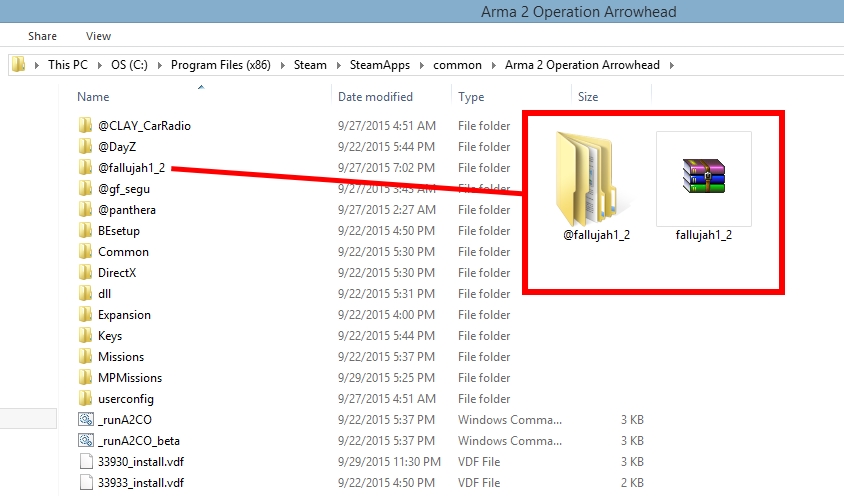
Create a new folder on your desktop, place the zip file into it and then extract the contents. You will now have a folder titled '@fallujah1_2'.
Navigate to your ArmA 2 Operation Arrowhead folder and drop the @fallujah1_2 into it. The path to your game folder is this:
C:\Program Files (x86)\Steam\SteamApps\common\Arma 2 Operation Arrowhead
03
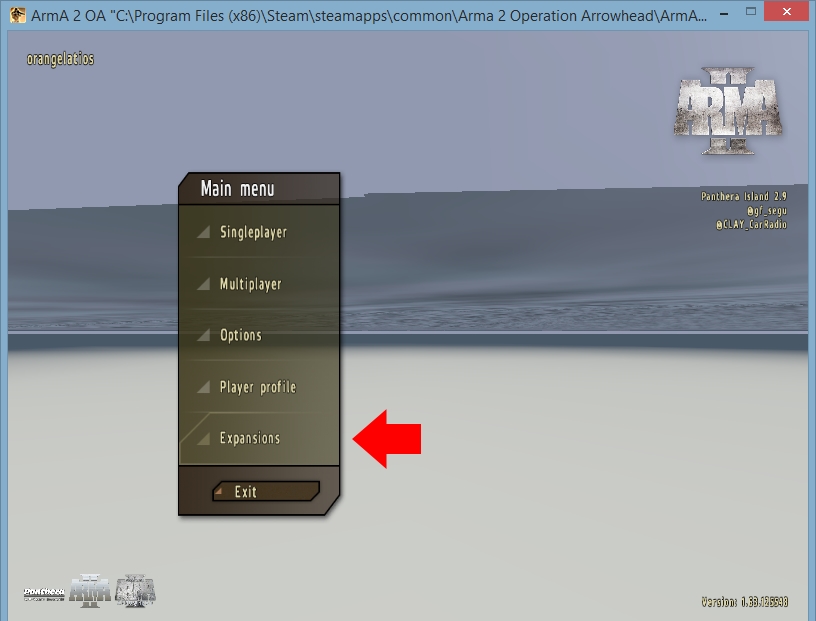
Launch ArmA 2 OA. On the first screen click the 'Expansions' button.
04
On the 'Expansions' screen you will see @fallujah1_2 listed as a disabled expansion (box is black, not green). Click '@fallujah1_2', click 'Enable' and then click 'OK.
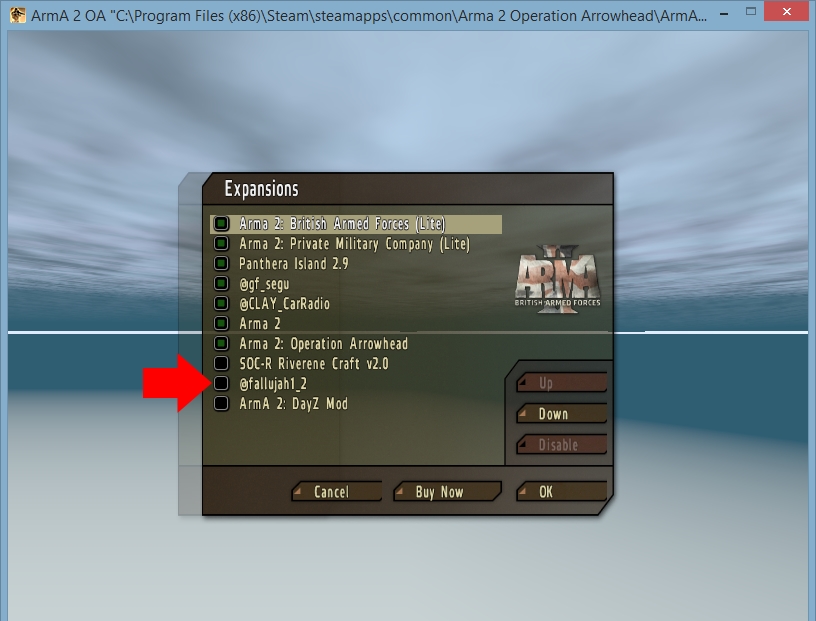
05
A new screen will pop up stating: "You need to restart the game to apply some of the changes made." Click 'OK'.
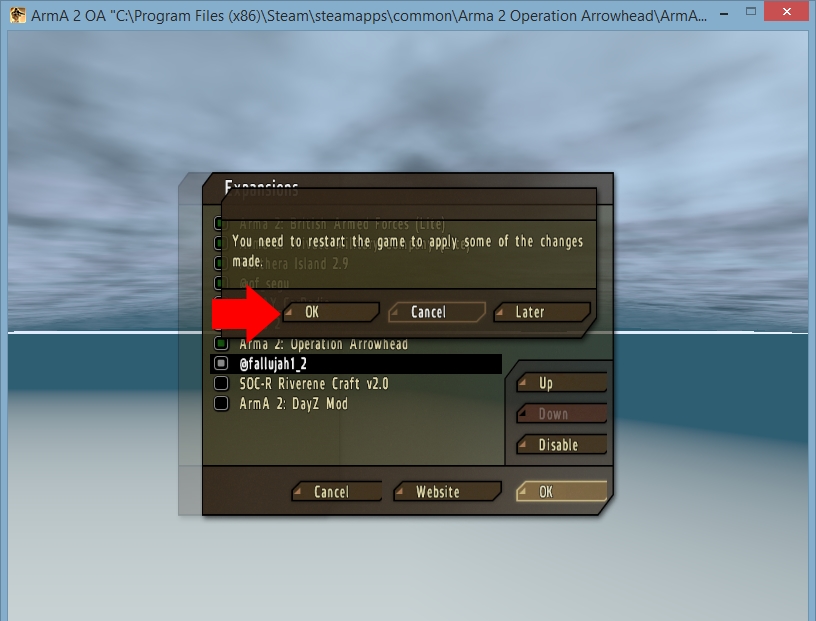
06
The game will automatically restart. Click 'Singleplayer' > 'Editor' and you will now see the new Fallujah v1.2 map listed on your 'Select map' screen. Click it and then click 'Continue'.
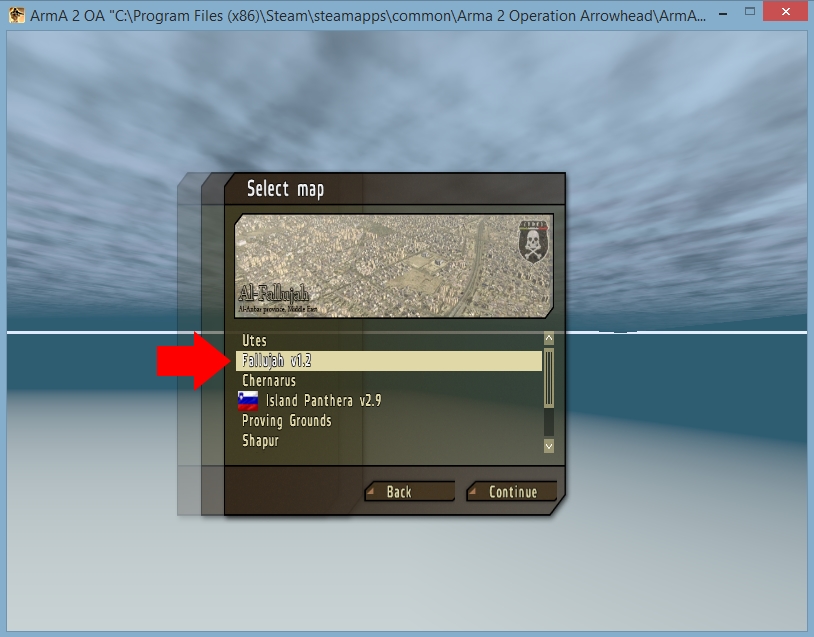
01
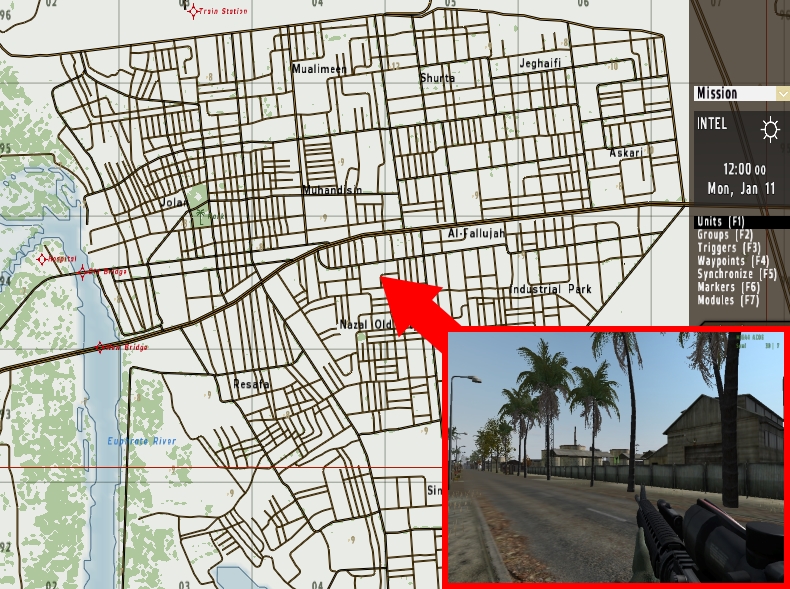
You have successfully installed the map. Take note that not all maps go in the same location. All maps beginning with the '@' are placed directly in the ArmA 2 OA folder. Any addon not beginning with '@' will go in your addons folder, which is located here:
C:\Program Files (x86)\Steam\SteamApps\common\Arma 2 Operation Arrowhead\Expansion\Addons
written by RJ Wattenhofer
