Open up your text editor (MS Notepad or similar), copy the following code into it and save the file as spawn-friend.sqf:
if (!isServer) exitWith {};
_spawnPos = markerPos (_this select 0);

_group1 = createGroup WEST;
_unit1 = _group1 createUnit ["US_Delta_Force_Air_Controller_EP1", [_spawnPos select 0,_spawnPos select 1,1], [], 1, "FORM"]; sleep 0.5;
_unit2 = _group1 createUnit ["US_Delta_Force_MG_EP1", [_spawnPos select 0,_spawnPos select 1,1], [], 1, "FORM"]; sleep 0.5;
_unit3 = _group1 createUnit ["US_Soldier_Crew_EP1", [_spawnPos select 0,_spawnPos select 1,1], [], 1, "FORM"]; sleep 0.5;
_unit4 = _group1 createUnit ["US_Pilot_Light_EP1", [_spawnPos select 0,_spawnPos select 1,1], [], 1, "FORM"]; sleep 0.5;
Open up a second document in your text editor, copy the following code into it and save this file as spawn-enemy.sqf:
if (!isServer) exitWith {};
_spawnPos = markerPos (_this select 0);

_group1 = createGroup EAST;
_unit1 = _group1 createUnit ["TK_Aziz_EP1", [_spawnPos select 0,_spawnPos select 1,1], [], 1, "FORM"]; sleep 0.5;
_unit2 = _group1 createUnit ["TK_Soldier_AT_EP1", [_spawnPos select 0,_spawnPos select 1,1], [], 1, "FORM"]; sleep 0.5;
_unit3 = _group1 createUnit ["TK_Soldier_AR_EP1", [_spawnPos select 0,_spawnPos select 1,1], [], 1, "FORM"]; sleep 0.5;
_unit4 = _group1 createUnit ["TK_Soldier_Crew_EP1", [_spawnPos select 0,_spawnPos select 1,1], [], 1, "FORM"]; sleep 0.5;
You can modify the unit codes and add additional infantry. The codes are available on the ArmA 2 OA: Infantry page.
Drop both files into your mission folder located here:
C:\Users\User\Documents\ArmA 2 Other Profiles\YOUR-NAME\missions
Or here:
C:\Users\User\Documents\ArmA 2\missions
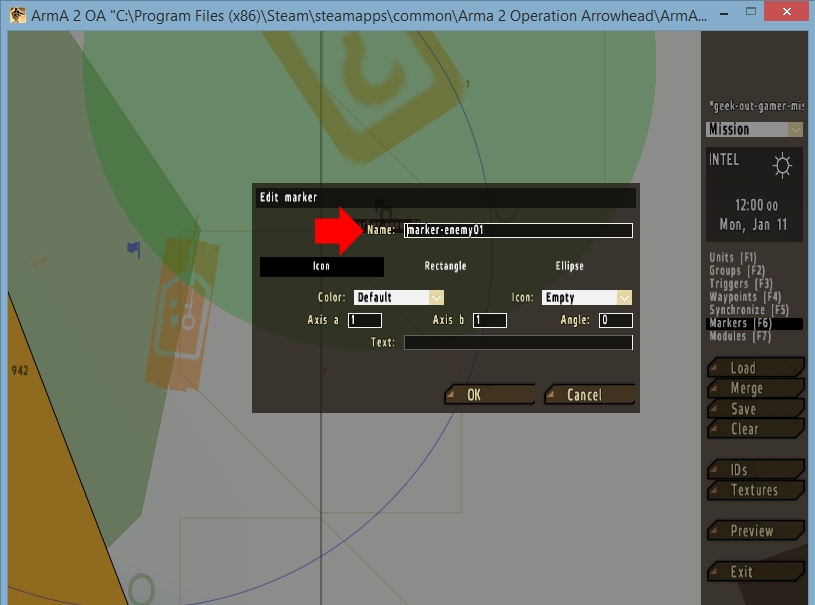
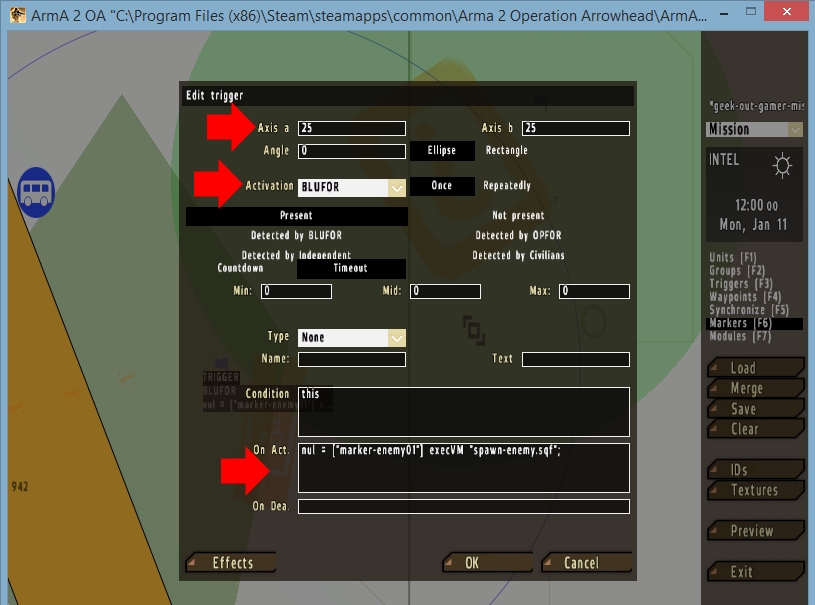
Launch ArmA 2 and go into the editor. Open your mission, place down a marker and name it 'marker-enemy01'. Now place down a trigger and set the 'Axis a' field and 'Axis b' field to the desired radius. Select BLUFOR from the 'Activation' dropdown and paste this code into the trigger's 'Initialization' field:
nul = ["marker-enemy01"] execVM "spawn-enemy.sqf";
Click 'OK'. Your spawner is set up and active. When any of your players enter the trigger four Takistani soldiers will appear, wait for 0.5 seconds and then attack. The delay can me adjusted in the code above. For other groups (Civilians, Independents, etc) use the spawn-enemy.sqf format. Feel free to create multiple spawn scripts for different situations in your mission.
written by RJ Wattenhofer